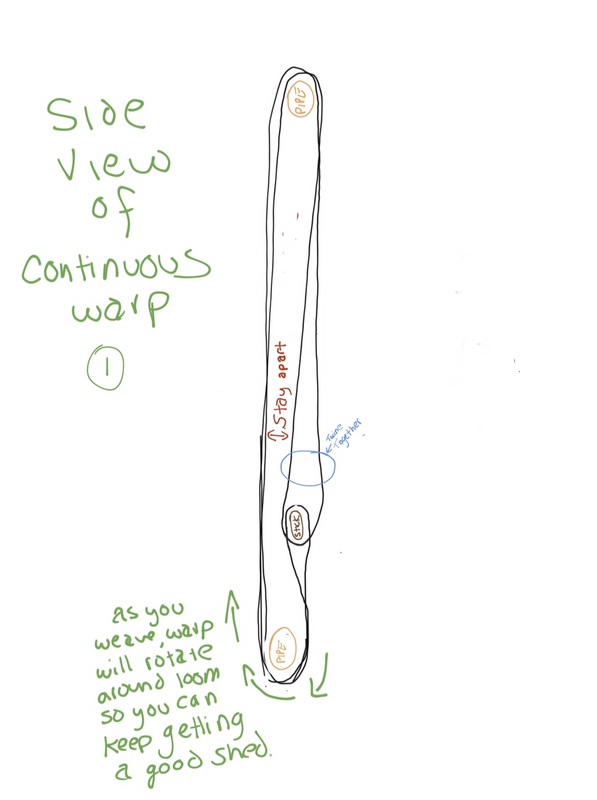
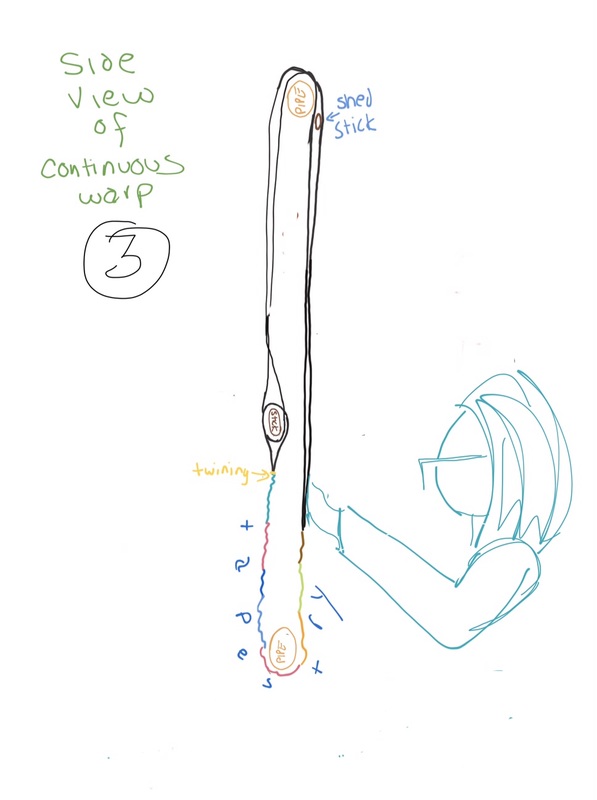
Or: Continuous Warping on a Tensioned Frame
The cloth advances up the back of the loom as weaving progresses at the front.
WHY?
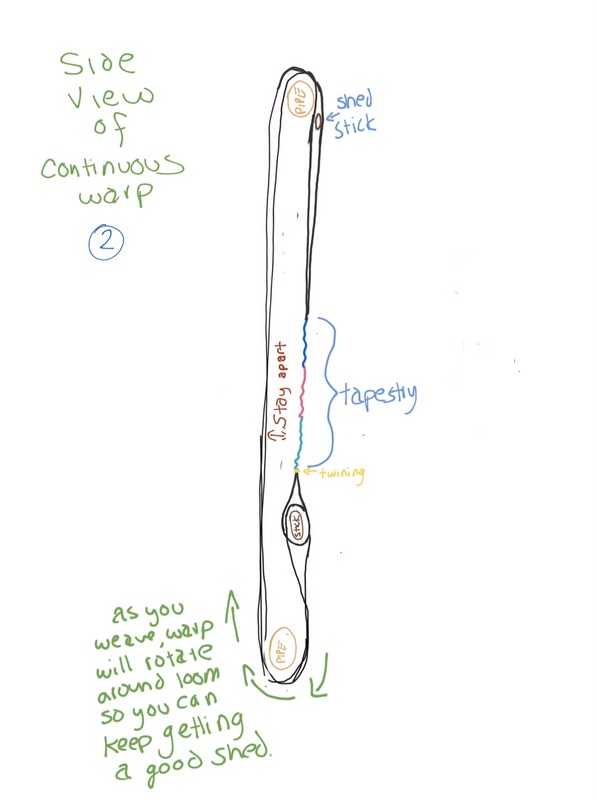
1. The warp circles around the loom so you can weave something up to 1 1/2 times its height.
2. You get a good shed for the entire piece
3. Since the warp advances, you can keep the fell at a comfortable positon and avoid potential back/shoulder/arm pain
1. The warp circles around the loom so you can weave something up to 1 1/2 times its height.
2. You get a good shed for the entire piece
3. Since the warp advances, you can keep the fell at a comfortable positon and avoid potential back/shoulder/arm pain
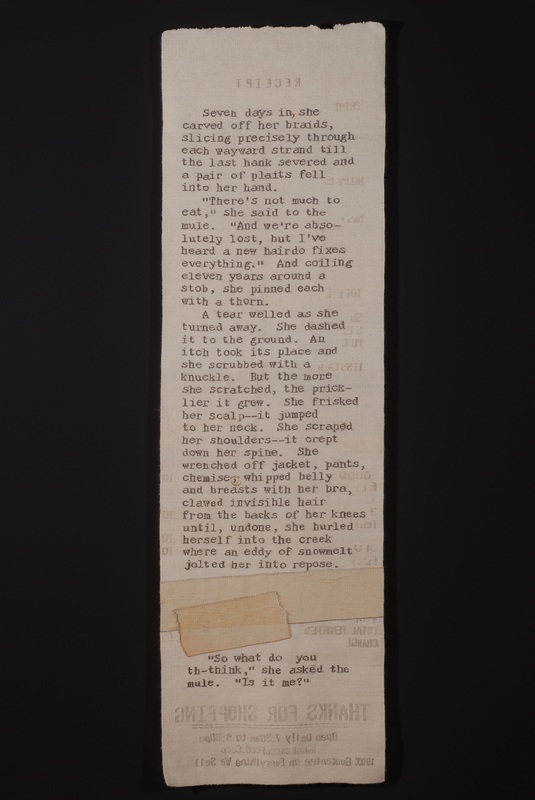 Rough Copy #4; hand woven tapestry; wool warp and weft 82" x 24" ©Sarah C. Swett 2010 |  Green Eggs; hand woven tapestry; wool warp and weft; 52" x 4" ©Sarah C. Swett |
You will need:
-Frame loom (PVC, Copper, Galvanized etc) with tension device
-Warp Stick: dowel 1/2 or 3/4 inch in diameter, approximately 1" shorter than inside width of the loom
-Straps or string for suspending warp stick
-Warp: yardage= circumference of weaving area (top to bottom plus an inch or two) x sett x warp width
-Scissors
-Tape
1. Set up loom
a. Make sure it is square and that the tension mechanism is in a position that allows you to add (and perhaps also subtract), tension later.
b. Mark warp stick and top and bottom bars of loom with increments of your choice (in or cm).
I usually do the marking on a piece of tape so I can change it later. For a sett of 8 epi, the marks can be 1/8 inch apart
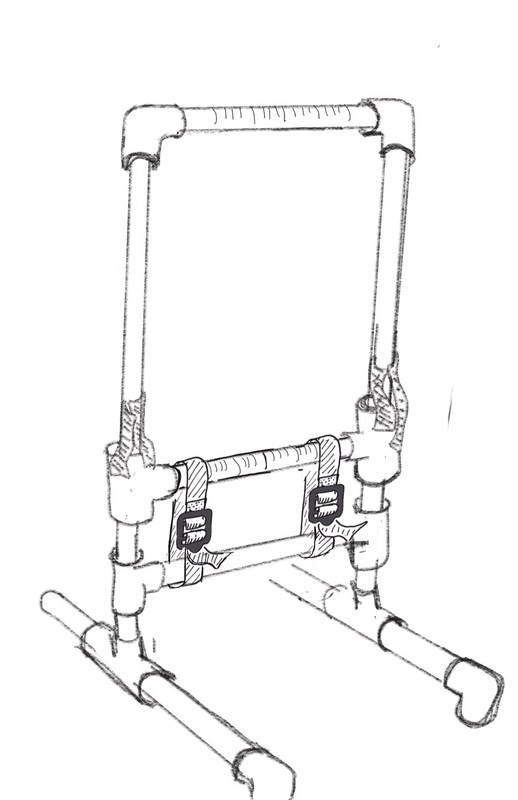
PVC pipe loom with strap tension set up to begin
2. Position warp stick at a comfortable height for warping (eye level is good whether you are sitting or standing) and secure with string or straps.
-Make sure it is level (or approximately level). Make sure your loom is level too...
- check to make sure that the center of top bar, bottom bar and warp stick line up
-Make sure it is level (or approximately level). Make sure your loom is level too...
- check to make sure that the center of top bar, bottom bar and warp stick line up
Using String to position Warp Bar. This method allows you to adjust the bar when the string is tight, but will keep it in place while you are winding the warp
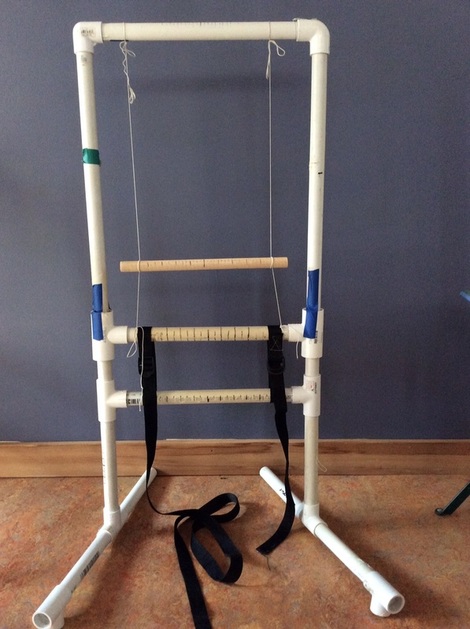 Warp Stick positioned with string on PVC pipe loom (same as drawing above) | 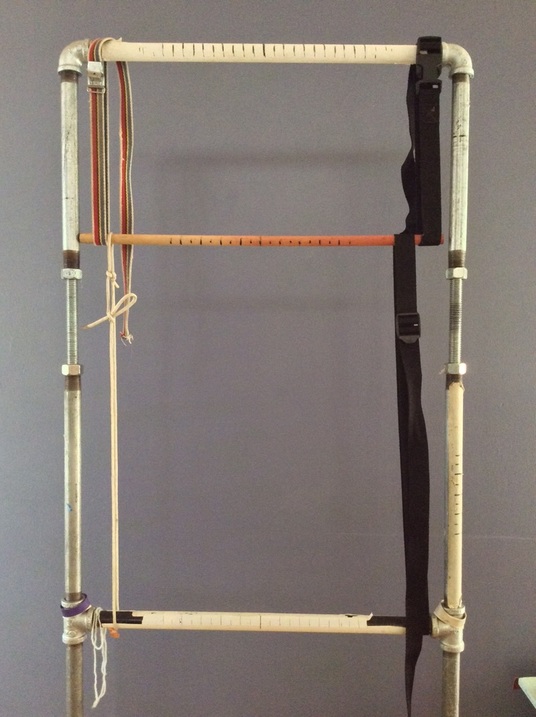 Warp Stick positioned with a motley collection of straps and string on Galvanized Pipe loom |
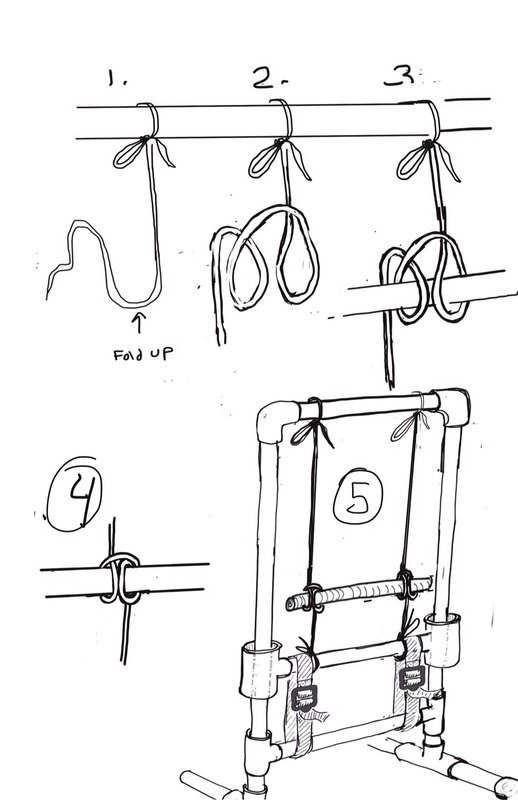
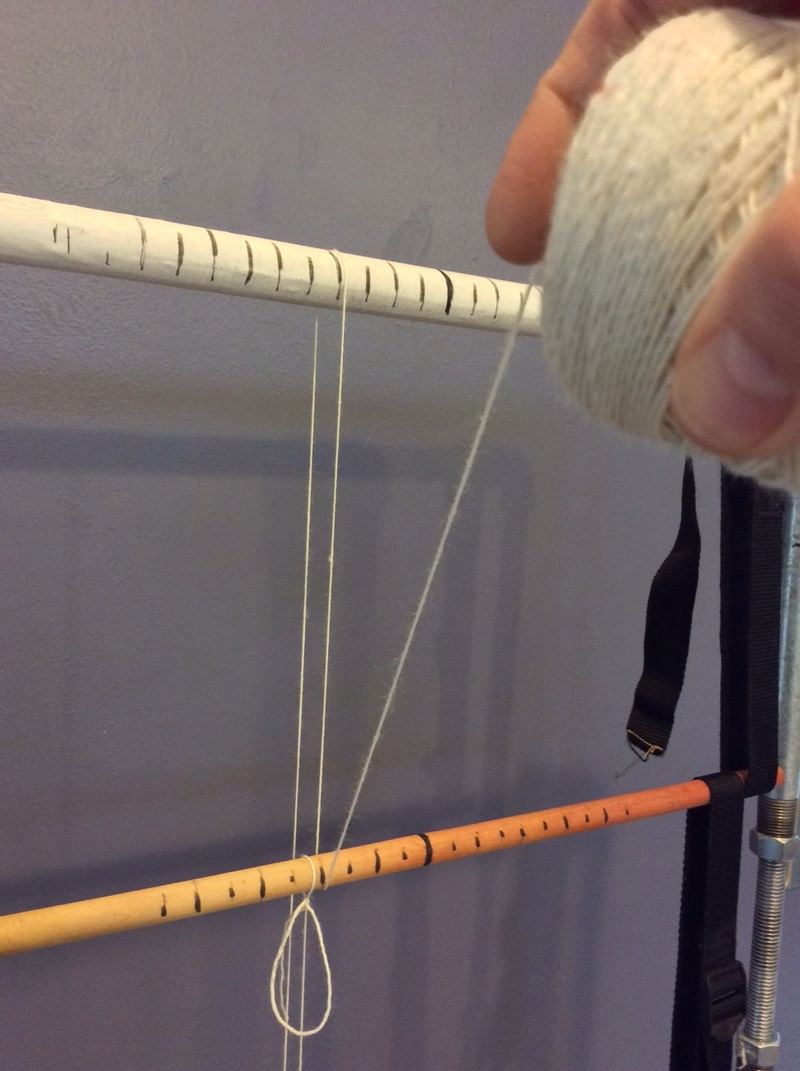
3. Attach warp to stick with half bow
to the left of center, half the planned width of your warp
(i.e. for a 4" wide warp, tie two inches to the left of center).
to the left of center, half the planned width of your warp
(i.e. for a 4" wide warp, tie two inches to the left of center).
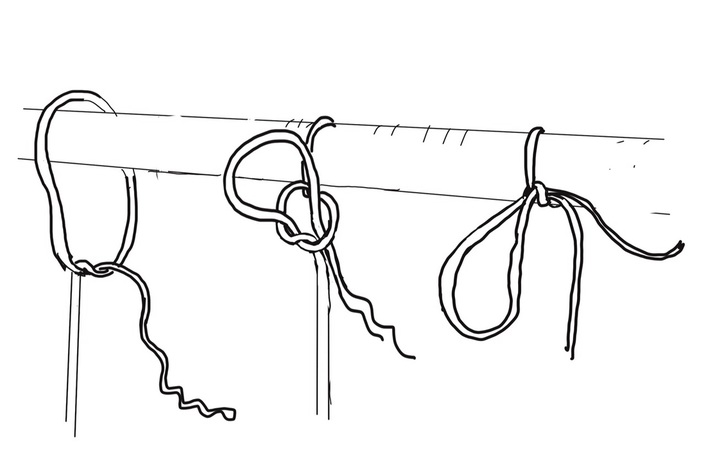
Tying a half bow
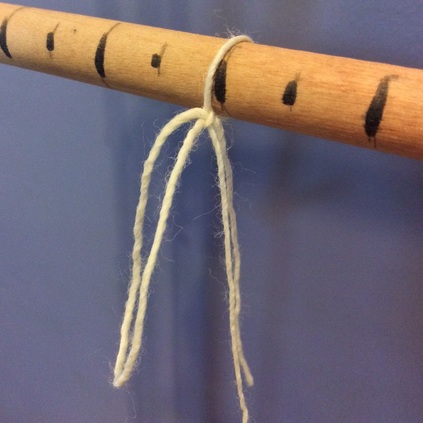
Half Bow in real life
4. Start Winding:
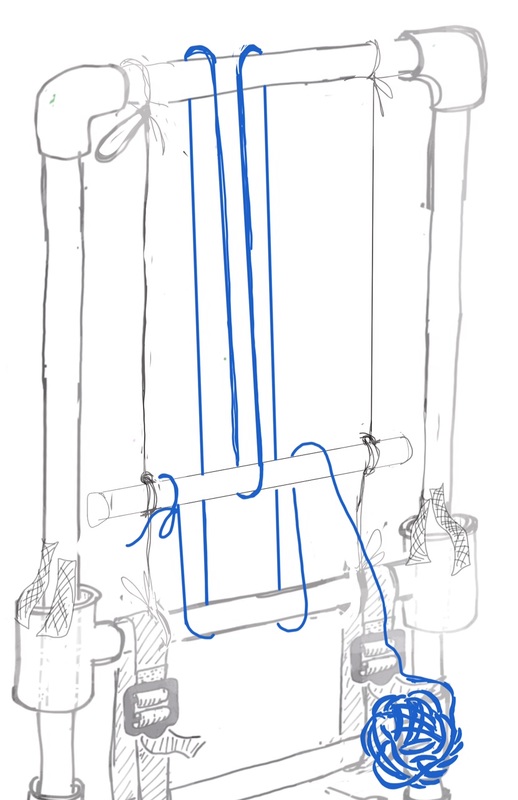
a. Beginning at the warp stick,
bring your yarn down and under the bottom bar of loom (front to back)
-in the case of a PVC loom with straps see illustration above-
b. All the way up the back and over the top bar (back to front)
c. Down and under the Warp Stick (back to front reversing direction)
d. Back up and over the top bar
e. All the way down the back and under the bottom bar (back to front)
f. Up and over the warp stick (back to front, reversing direction again)
repeat from a.
 Step c: Down and under the warp stick, back to front, reversing direction | 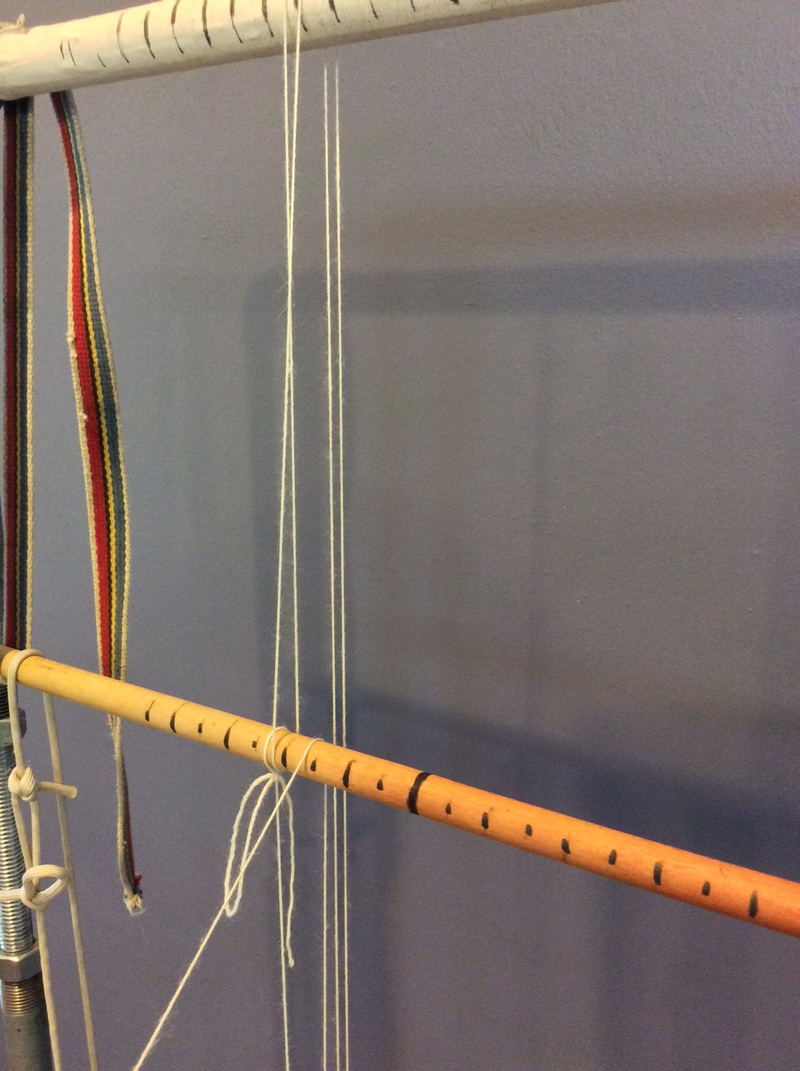 step f: Up and over the warp stick (back to front, reversing directions again) |
NOTE 1: for a sett of 8 dpi, warp strands will be 1/8" apart where they go over the top and under the bottom beams. On the Warp Stick the alternate loops will also be 1/8 inch apart
-- try to keep warp evenly spaced (it is easier to deal with and to count this way), but exact positioning is not critical. You will have the opportunity to adjust later
NOTE 2: check periodically to make sure the winding pattern is correct and that the yarn running up the back does not cross over to the front. If you have accidentally done this, unwind to that point and redo it
Continue in this pattern until you have the number of warp ends you need.
one full repeat makes two warp ends
Temporarily tie or tape the end of the yarn to the warp stick before adjusting tension.
A double half hitch works well as you can take up the slack without untying it.
one full repeat makes two warp ends
Temporarily tie or tape the end of the yarn to the warp stick before adjusting tension.
A double half hitch works well as you can take up the slack without untying it.
Running a hand between front and back to make sure there are no accidental cross overs.
5. Adjust tension:
Pull on the first strand on one side above the warp stick, then on the adjacent one below the stick to take up slack. Repeat across. Then do it again -- not to make it more tight, but to make it more even. Run your fingers lightly across the warp at the back; when you are done it will feel even and all the strands should stop wiggling at about the same rate.
Tie the end firmly to the warp stick. (I use a half bow again)
6. Adjust position of loops on the warp stick
The loops should be 1/8" apart (one facing up, 1/8 inch space, then one facing down).
7. Remove string/ straps holding stick in place
and pull down on the stick, sliding it closer to the bottom of the loom (approx 4 inches above the bottom beam). Note how the warp rotates around the loom. If you have made the warp very tight, you may have to release a little bit of tension to do this.
When it is in position, tighten tension so it stays put.
NOTE: On a frame loom without an intrinsic tension device it might be possible to add tension by using shims -- sticks shoved between the warp and the top and bottom parts of the frame -- to add and release warp tension.
8. Adjust position of warp at top and and bottom beam.
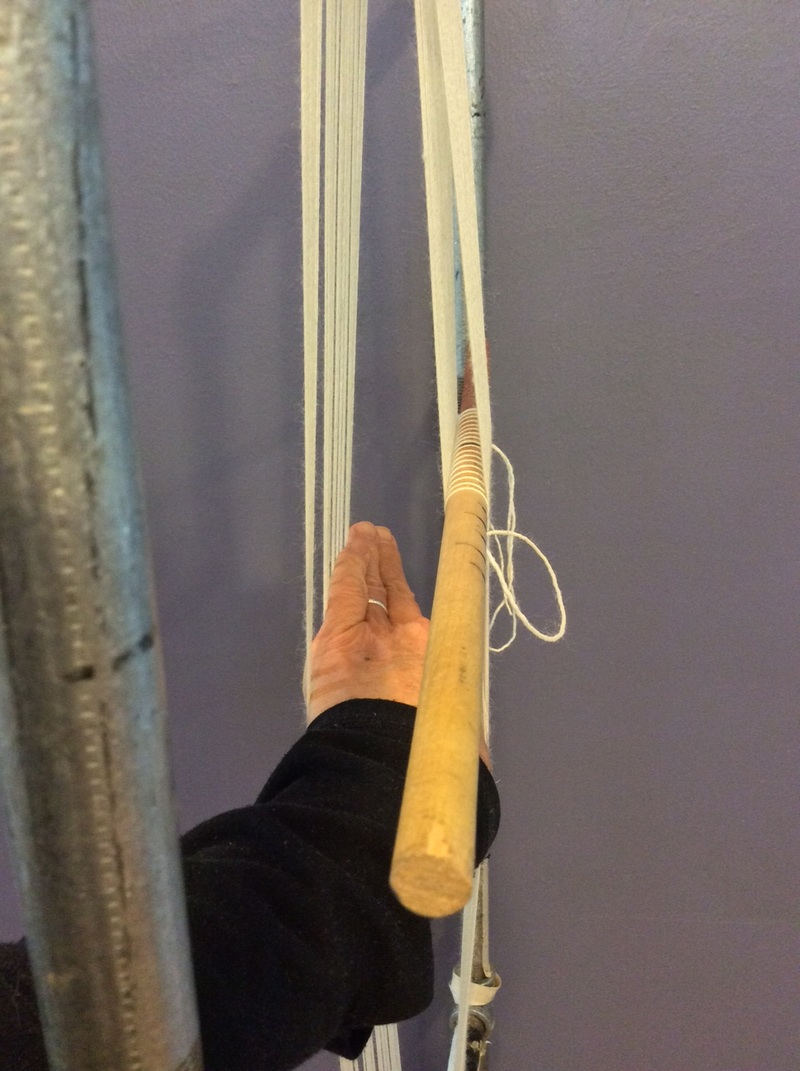
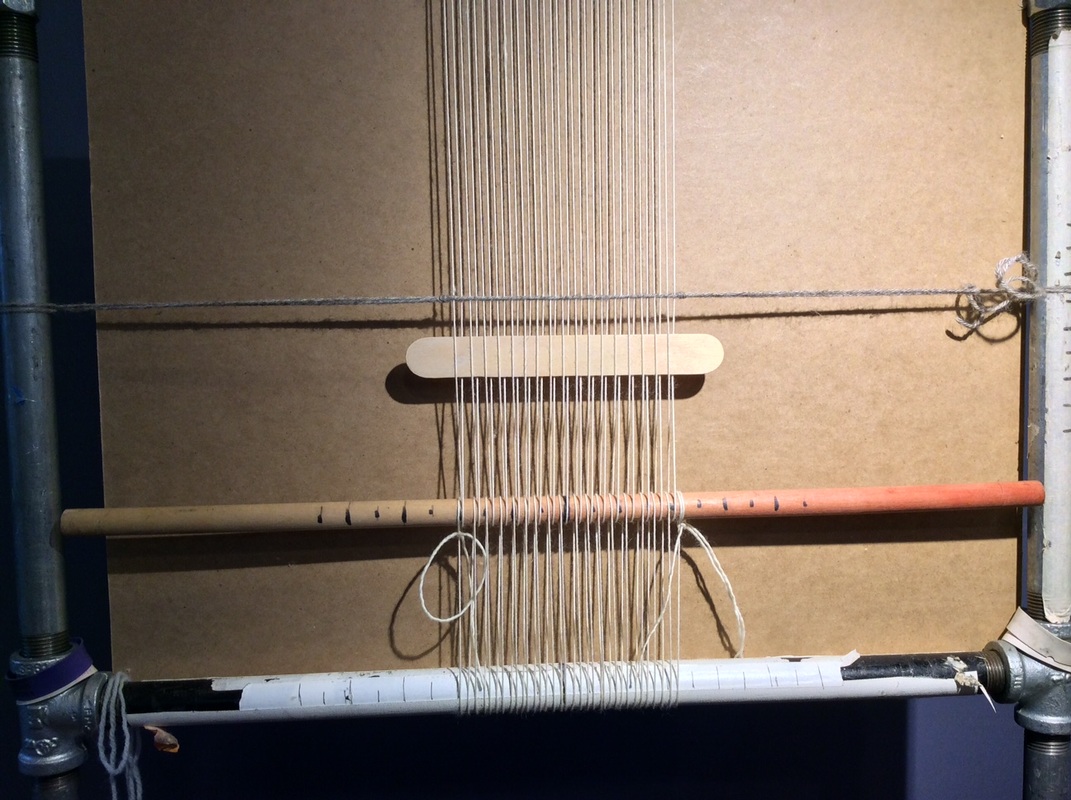
9. Make sheds:
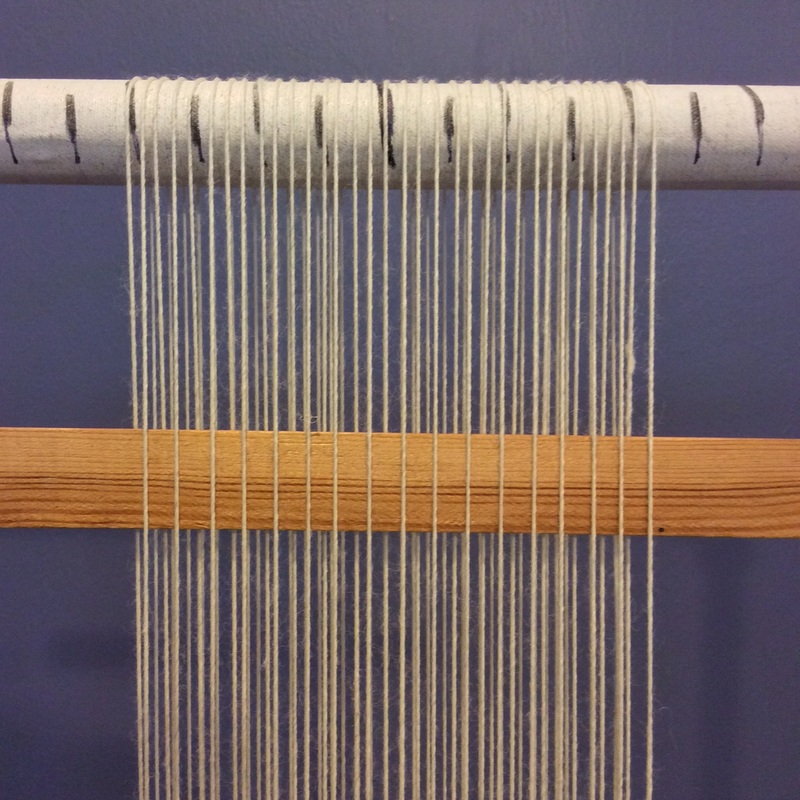
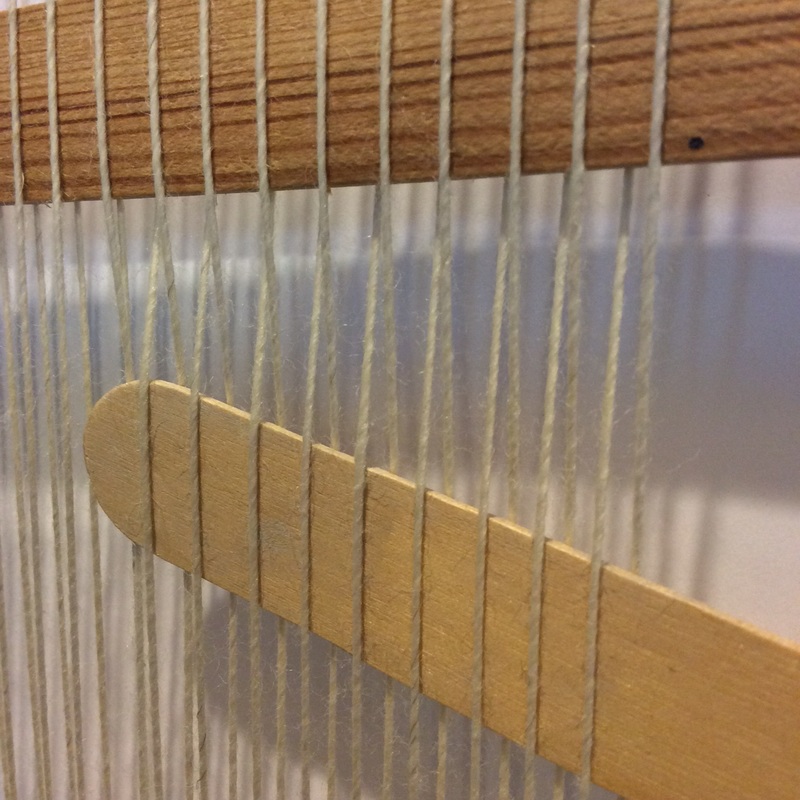
Slide a shed stick/dowel in above the warp stick and push it to the top of the loom.
Warp should alternate over and under the stick.
Weave in a second stick (tongue depressor for a narrow warp) just below in the opposite shed. (You can slide a piece of paper/ cardboard between layers of the warp so the back (stored) warp isn't too distracting while you do this.
Push tongue depressor/second stick down until it is about 3 inches the warp stick to bring layers together
 |  |
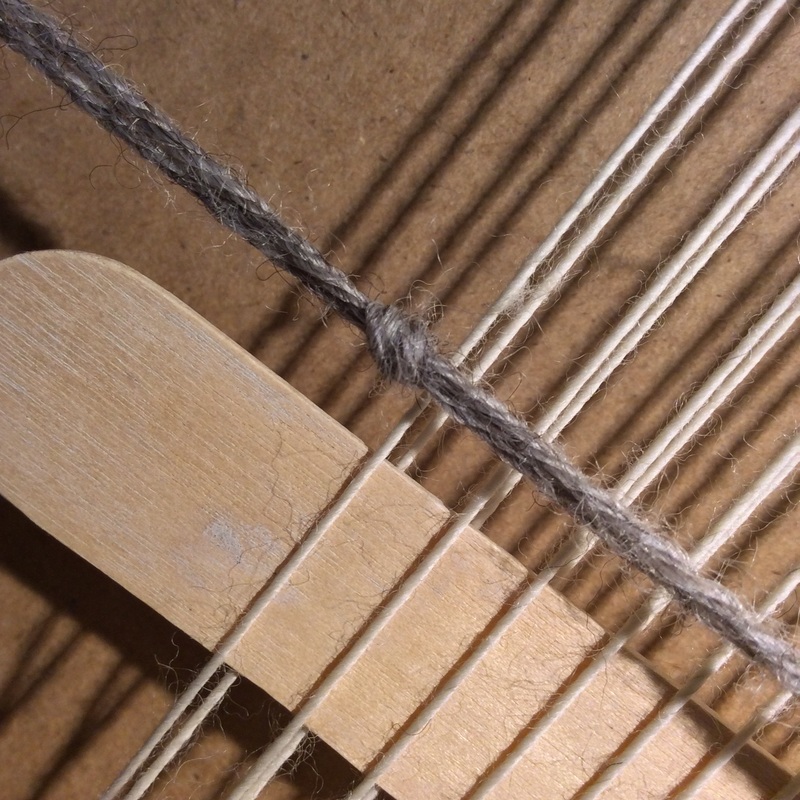
10. Twine -- Twining holds the layers together and fixes the sett
- Cut a strand of warp 2 1/2 X the width of your loom,
-Attach it to the left side bar of the loom using a larks head knot
-Tie an overhand knot at the left side of the warp to keep it in place
Twine across:
--Slip one twining strand behind first warp and out to the front
--Bring the second twining strand over the first, behind the next warp and out to the front
--pick up the first twining strand again, bring it over the second one and behind the next warp.
Continue across.
Note that the two twining strands twist around each other between each warp. If you are working with a fine warp, the sett may become too close. In this case, twist the two twining strands twice around each other between each warp to create more space.
 Twining knot positions left side of warp | 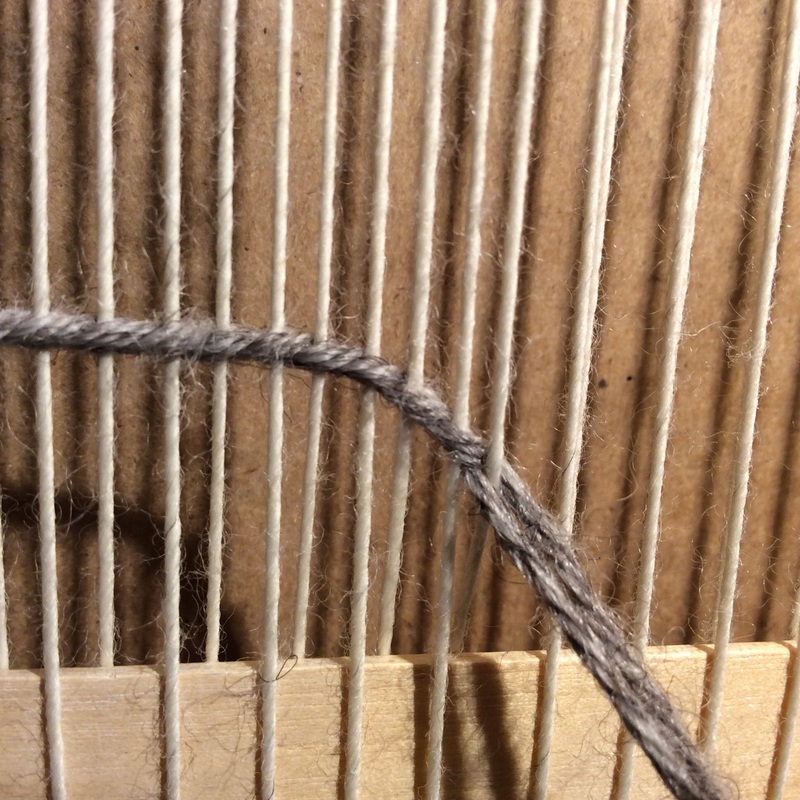 Twining across |
| When you get to the right side of the warp, knot the twining strands together again to keep the warp in place. Note: if you slip the point of a bobbin into the knot, it will help you position it exactly. Tie the tail ends of the twining yarn to the right side bar of your loom. | 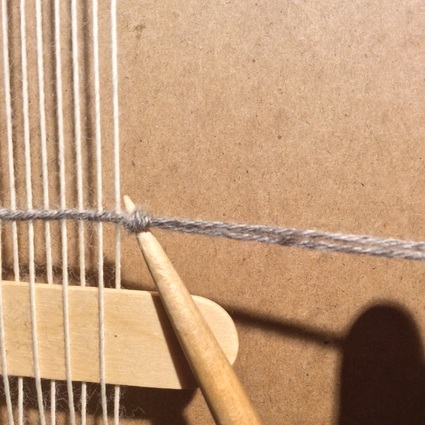 Twining knot positions right side of warp |
Twining in place
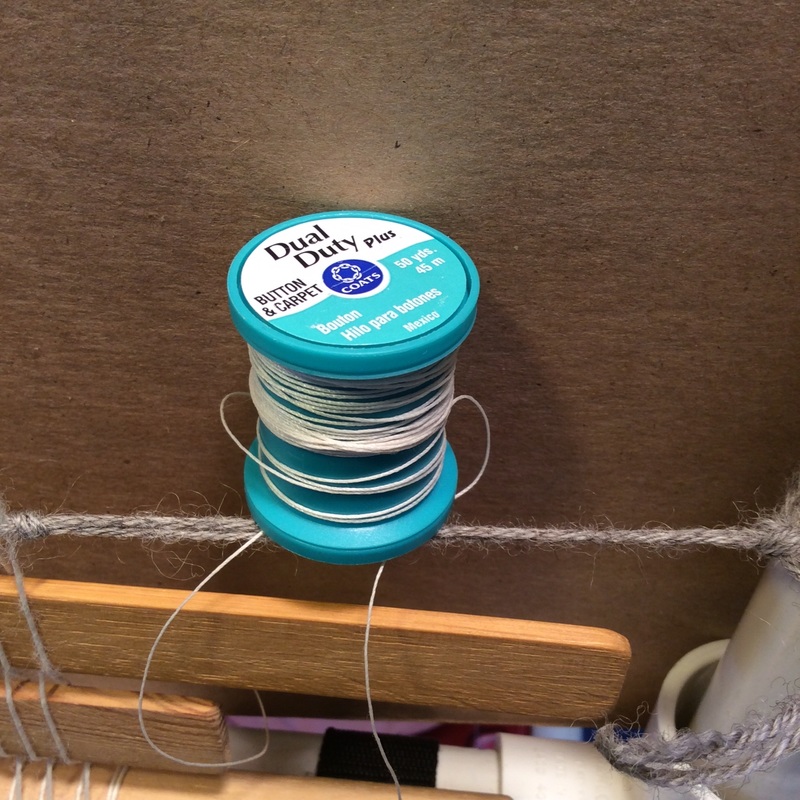
11. Half Hitches with craft thread
Before starting to weave, I tie double half hitches around each warp end just above the twining.
This makes extra sure that the tapestry stays in place when it is cut from the loom.
When the tapestry is done, I repeat the double half hitches at the top before cutting off.
Before starting to weave, I tie double half hitches around each warp end just above the twining.
This makes extra sure that the tapestry stays in place when it is cut from the loom.
When the tapestry is done, I repeat the double half hitches at the top before cutting off.
 |  |
Now start weaving as you would on any warp.
When the fell gets uncomfortably high, advance the warp by loosening the tension on the loom and moving the warp stick until the fell is again in a comfortable position.
The stick will soon slide under the bottom bar of the loom (this needs a VERY loose warp), and then continue up the back over time as you advance the warp.
I usually stop before the stick comes back over the top bar, but it is possible to keep going as long as you can make a shed.
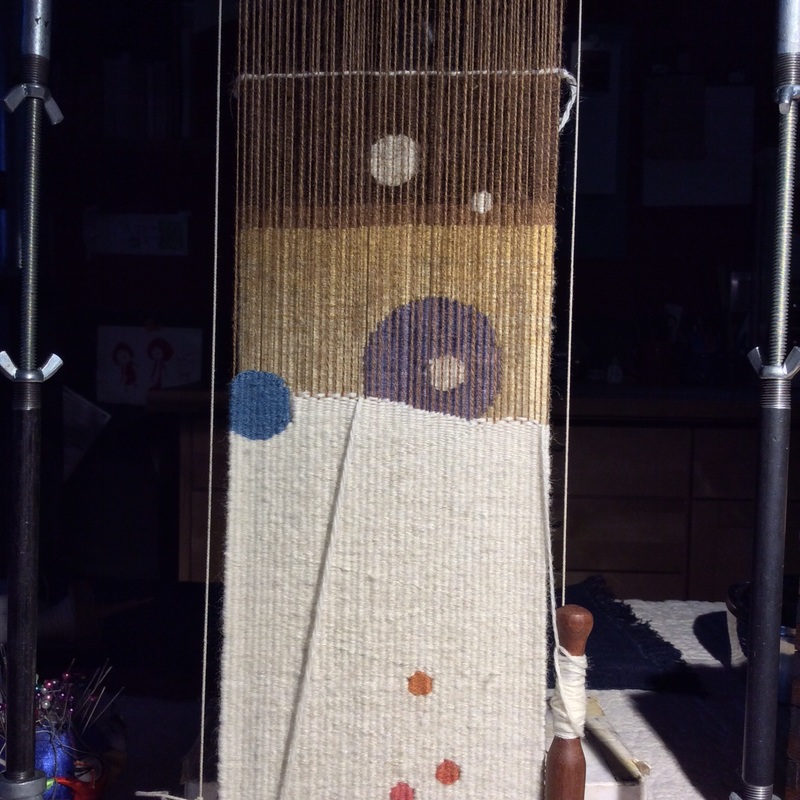
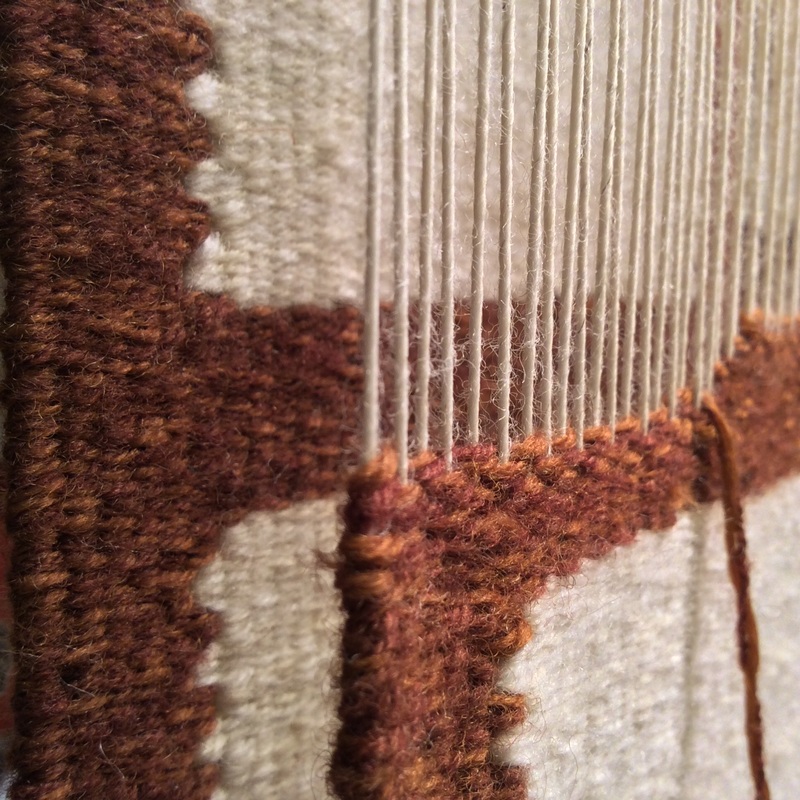
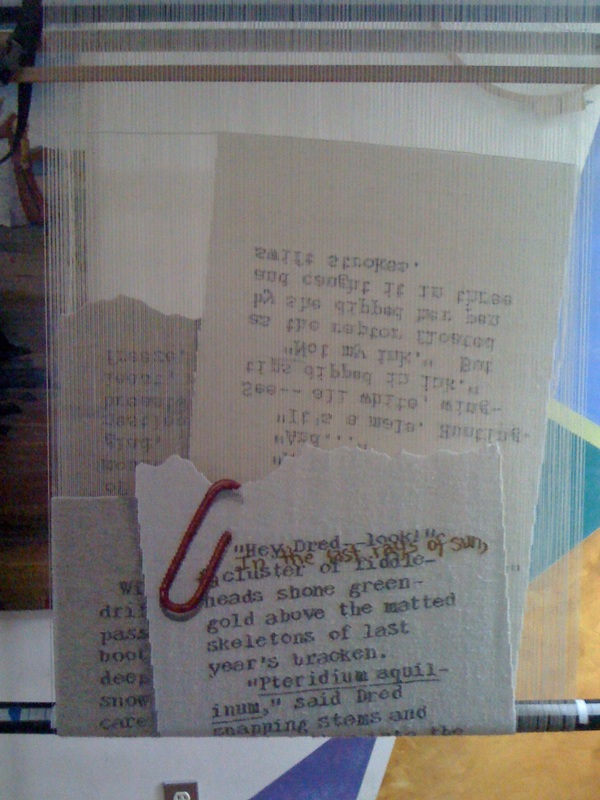
As the tapestry advances, the back of the already woven cloth shows through.
I don't think physical therapists would approve of the position of this weaver's hands relative to her glasses... make sure you work at a comfortable height for your body.
Rough Copy #9; detail just before cutting it off the loom. Half Hitches across the rough top hold all the shapes in place.
Well, I think that's it!
Hope things are clear for those who want this info. Most of this is repeated in a slightly different form in my book Kids Weaving, so if you have the book, you're all set.
Happily it is due to be re-issued in the spring of 2017 so then I can just refer to it
Next week I plan to be back to my usual meanderings.
Nuff with the instructions, eh?