Because sometimes you just don't want fringe.
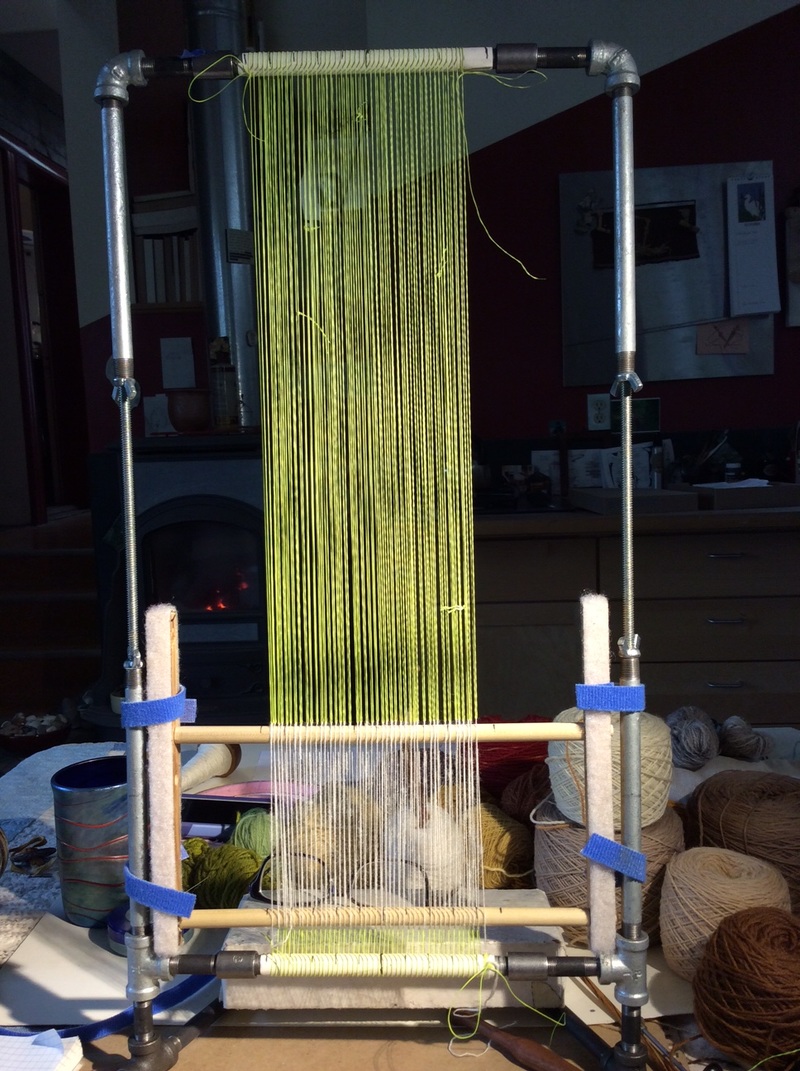
 Four Selvedge Warp on an 1/8 inch Galvanized Pipe Loom,
 I learned about four selvedge warping from
Susan Martin Maffei .
The method I describe here
is my variation
of Michael Rohde's variation
of Susan's technique.
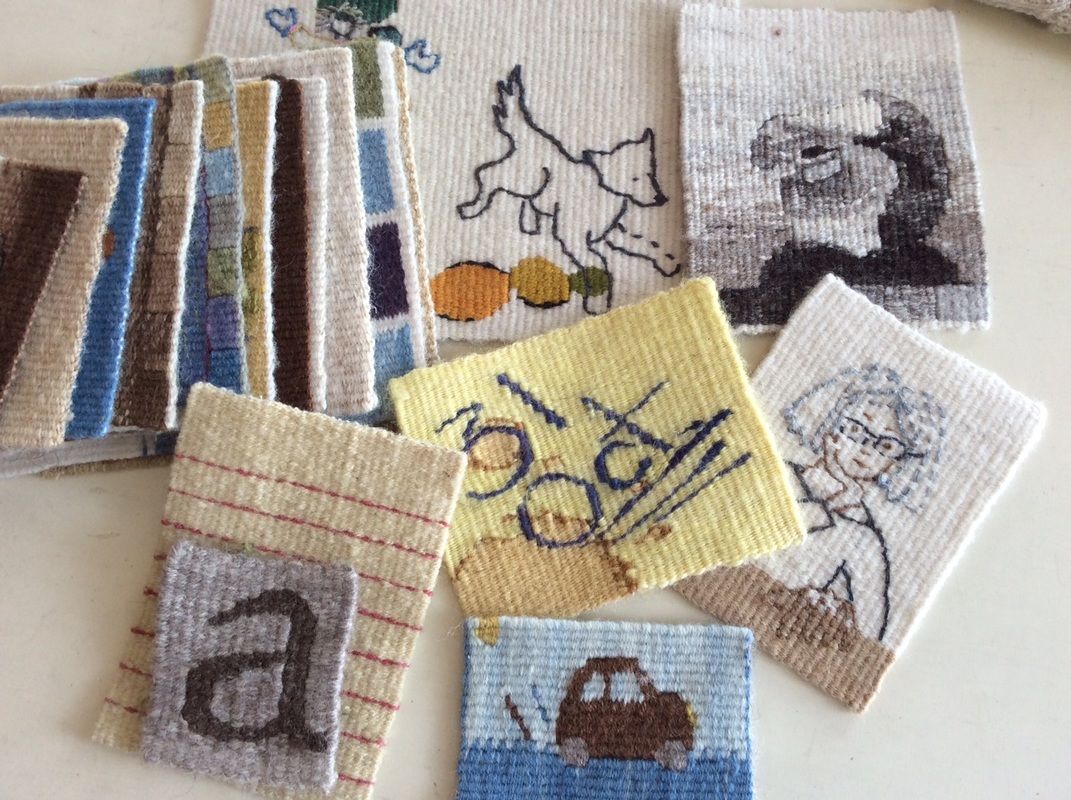
Making tapestries without thrums, fringe or edge finishing has changed my weaving life in myriad ways, the most obvious of which has been my relationship with small format tapestry--once a distraction I could neither like nor leave alone and now the focus of my work.
I hope it is useful to you.
Note: This is a long and detailed post. In it I have assumed some familiarity with basic tapestry technique: warp, weft, ends per inch and the like. To define everything would make it even longer so to learn more about tapestry weaving I recommend The American Tapestry Alliance website, the posts showing up on the current ATA Blog Tour, the classes taught by these bloggers (on line and off), or some of the myriad blogs and videos on the web that come to us by the grace of that amazing source of information --Google.
Susan Martin Maffei .
The method I describe here
is my variation
of Michael Rohde's variation
of Susan's technique.
Making tapestries without thrums, fringe or edge finishing has changed my weaving life in myriad ways, the most obvious of which has been my relationship with small format tapestry--once a distraction I could neither like nor leave alone and now the focus of my work.
I hope it is useful to you.
Note: This is a long and detailed post. In it I have assumed some familiarity with basic tapestry technique: warp, weft, ends per inch and the like. To define everything would make it even longer so to learn more about tapestry weaving I recommend The American Tapestry Alliance website, the posts showing up on the current ATA Blog Tour, the classes taught by these bloggers (on line and off), or some of the myriad blogs and videos on the web that come to us by the grace of that amazing source of information --Google.
Four Selvedge Overview:
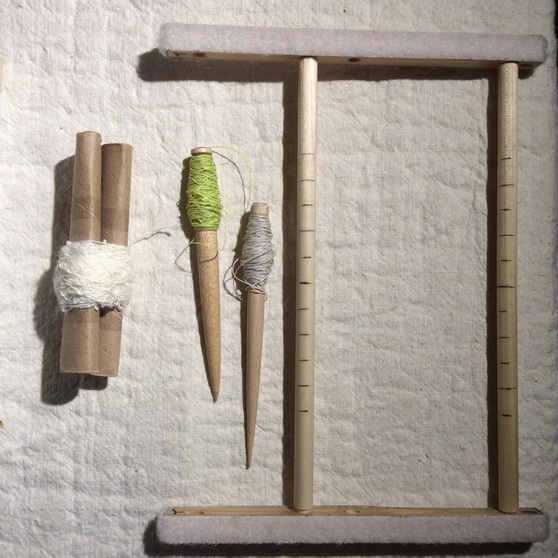
1. Wind your warp around a jig
2. Lash that warp to a loom, top and bottom, with supplementary warps
3. Weave your tapestry
4. Remove the supplementary warps
5. Done!
The resulting tapestry will have no fringe and thus need no hemming. This technique resembles the Navajo approach to warping except that one can easily open the shed all the way to the top of the tapestry so there is no need to cram in the last rows.
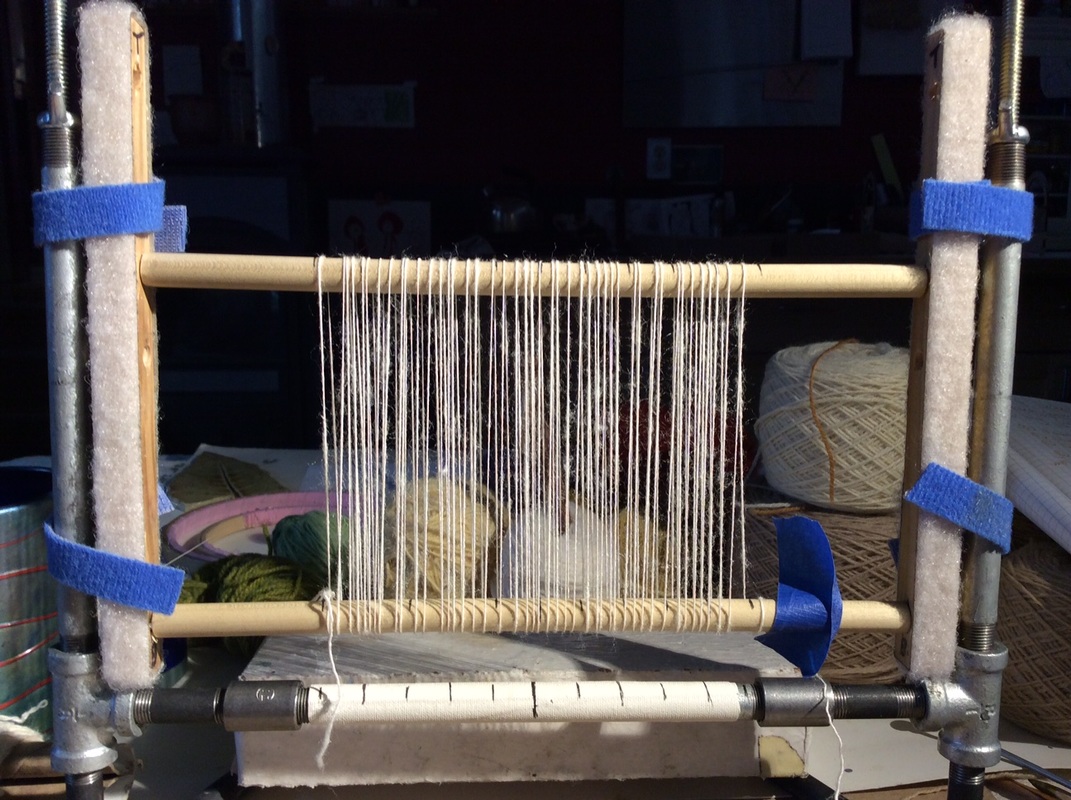
Bottom to top: supplementary warp warp one (green), actual warp (grey), supplementary warp two (green)
You will need:
-Fine, Strong warp (Actual Warp)
-Fine strong cord for supplementary warps (I use Fly Line Backing)
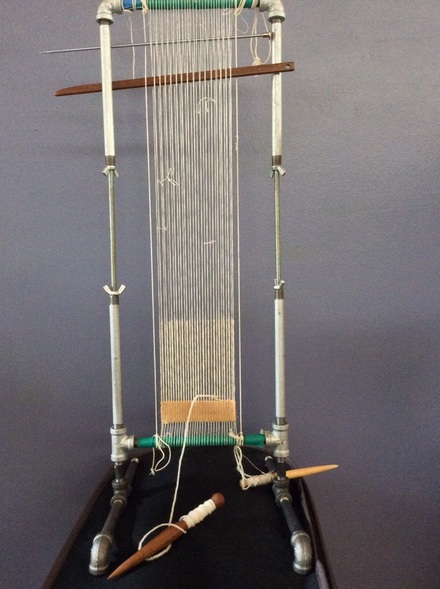
-Loom with a tension mechanism
- A Jig
-Shed Sticks
-Tape (masking or painters blue)
-Scissors
-Ruler/ tape measure
- Weft for your tapestry!
-Fine, Strong warp (Actual Warp)
-Fine strong cord for supplementary warps (I use Fly Line Backing)
-Loom with a tension mechanism
- A Jig
-Shed Sticks
-Tape (masking or painters blue)
-Scissors
-Ruler/ tape measure
- Weft for your tapestry!
Actual Warp: merino/silk singles (not recommended for your first one); Supplementary Warp (Fly LIne Backing in two colors) on bobbins; Jig made by Michael Rohde and modified by me
At the end of these instructions is an appendix of sorts with more info on warp, jig and loom variations.
1. Wind Actual Warp
a. Measure out your warp of choice and wind it onto a bobbin.
Calculation: Jig Circumference x sett x width of tapestry= ammt. of warp you will need
--jig circumference = tape measure circled once around the bars of the jig--
b. Tie a half bow on the bottom bar of the jig (something you can undo easily)
and wind 1 complete round for each warp end planned.
--The warp should be even and snug but not tight--
Make sure the strands so not overlap
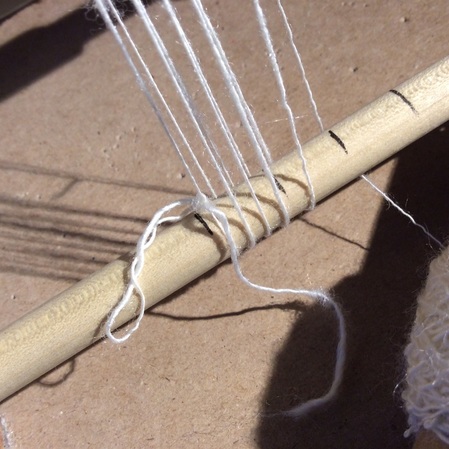
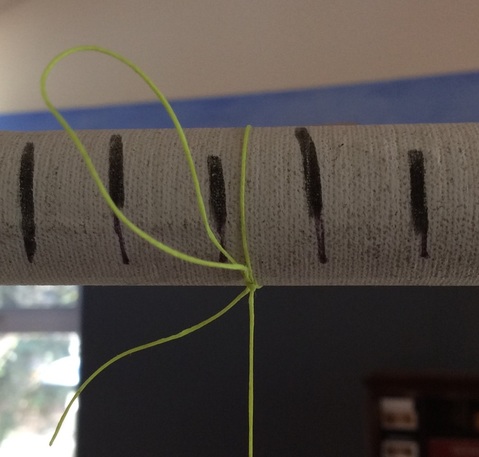
Tie Half Bow on Bottom Bar of Jig
-b. When done, break off warp leaving a 6 - 8 inch tail
Attach the tail to the bottom bar of the jig in some way that can be easily undone and adjusted:
--Half bow, two half hitches, or tape as below--
c. Attach Jig to Loom if not already there
Attach the tail to the bottom bar of the jig in some way that can be easily undone and adjusted:
--Half bow, two half hitches, or tape as below--
c. Attach Jig to Loom if not already there
Note Michael Rohde's handy dandy velcro system for firmly but temporarily attaching the jig to the loom
d. Adjust warp tension.
Pull on alternate strands with even pressure
taking up the slack as you go across.
I usually do this 2 - 3 times
using the same amount of tension with my fingers each time.
----The strands should be firm and even but not tight.-----
Do NOT make it tighter and tighter with each trip across.
Try not to bend the bars of your jig.
If you run your finger across the warp you can feel the tight and loose places, if any.
e. Adjust spacing at top and bottom of jig
Adjusting warp tension
 Winding fly line backing onto a bobbin
 2. Supplementary Warp #1
a Wind fly line backing onto a bobbin, or slim stick--a pencil would probably work
--It doesn’t matter if you run out as you can knot one piece of supplementary warp to another--
b. Untie half bow at beginning and tie it to the fly line backing.
--I use an overhand bow, my go-to knot for this technique--

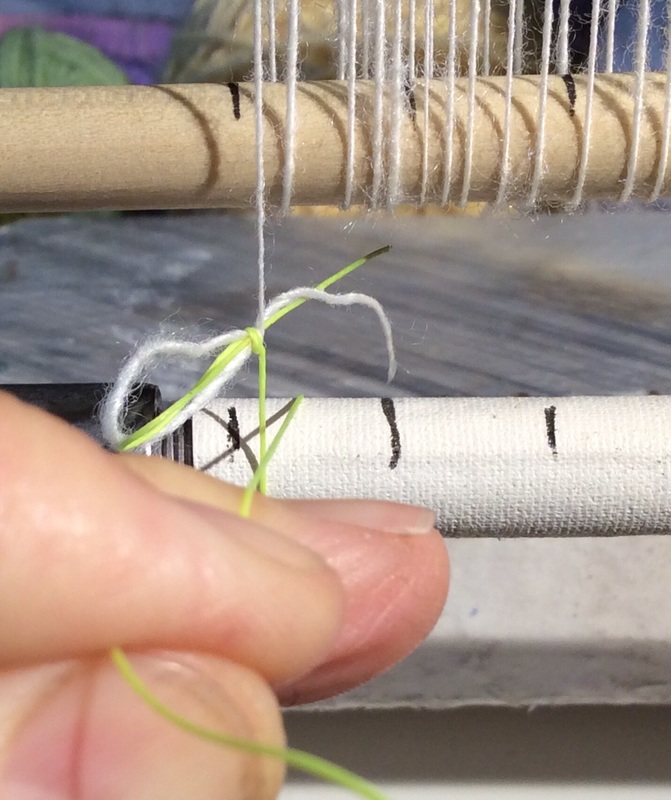
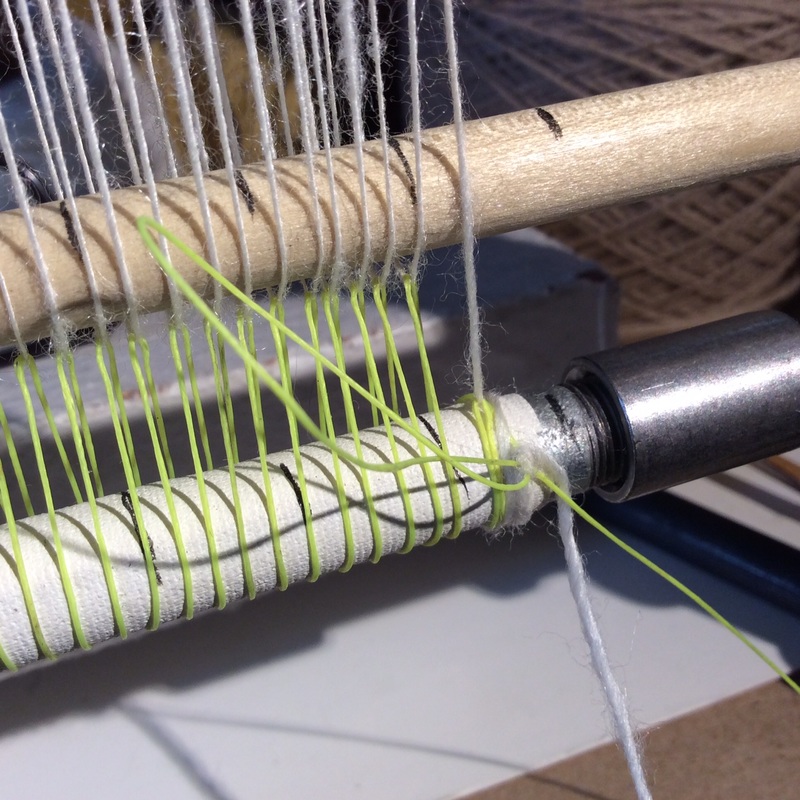
Actual Warp and supplementary warp tied together. Note: I didn't adjust the warp spacing very well on the jig. Below you can see that I am more careful when lashing to the loom
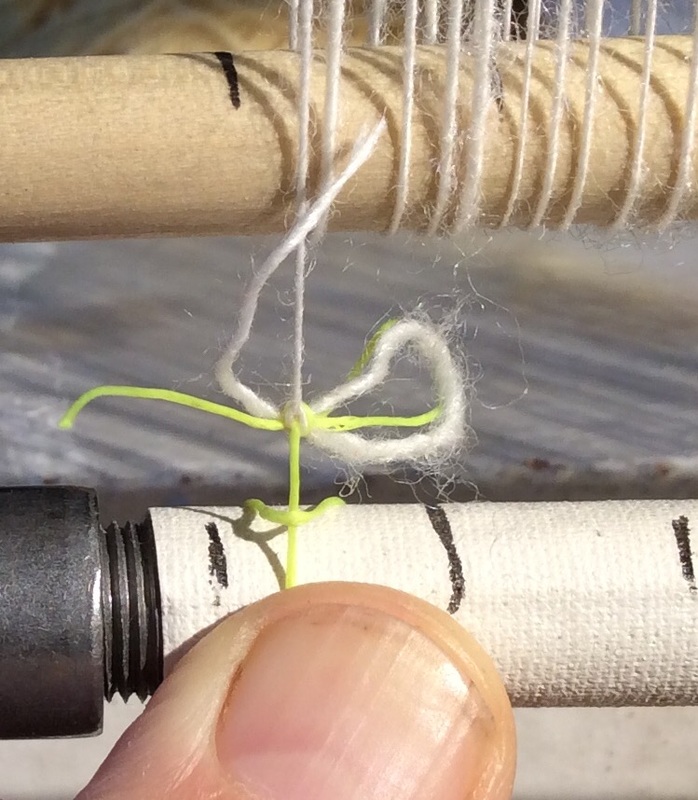
c. Center First Warp
Bring the bobbin around the bottom bar of loom,
circle it around itself, then back around the bottom bar to the front.
(see two photos below)
The warp end end is now centered on the bottom bar of the loom
Bring the bobbin around the bottom bar of loom,
circle it around itself, then back around the bottom bar to the front.
(see two photos below)
The warp end end is now centered on the bottom bar of the loom
 |  |
d. Begin Lashing on
Slide the bobbin through the front of the first warp loop,
down and around the bottom bar
then up to grab the second warp loop.
--Pull each loop so that the bottom of the actual warp loop is ever so slightly below the jig. This is an easy way to tell that you are putting the same amount of tension on each loop and that the supplementary warp is neither too slack nor too tight--
e. Continue across, carefully spacing the supplementary warp and keeping the tension consistent.
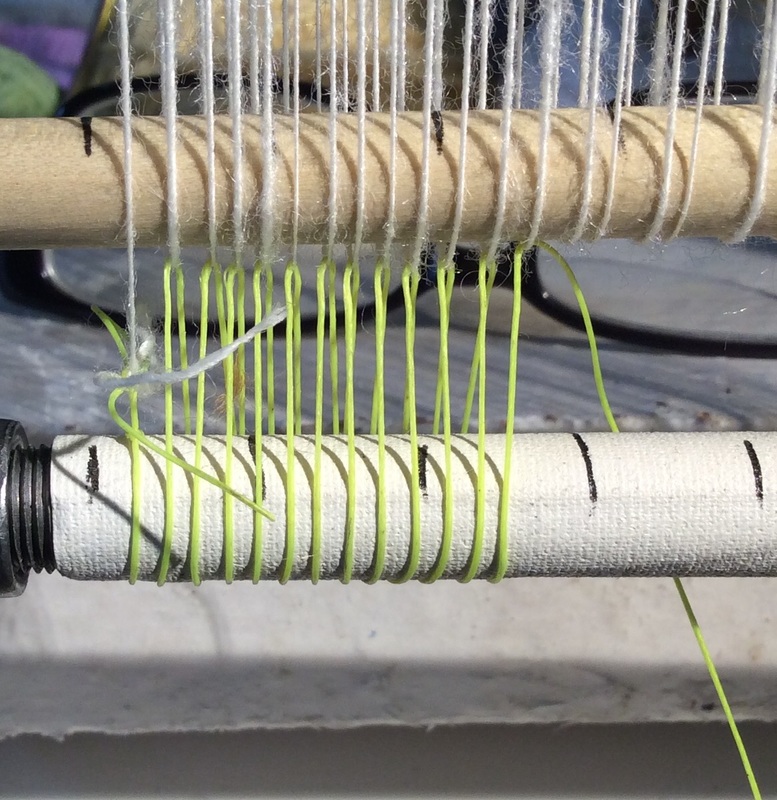
f. When you reach the last warp
Untie the end of the Actual Warp from the jig and use the supplementary warp to circle around and center it on the bottom beam as you did at the beginning.
Wind both strands in opposite directions around the bottom beam then tie together firmly.
--I use a half bow as usual with a half hitch around the loop to make sure it doesn’t come untied--
(see photos below)
If you are not a knot person, it is possible to use tape to hold the ends in place, but make sure it is good and solid as there will be increased tension as you weave and it is not fun if your warp loosens up and you are fighting with it rather than appreciating its wonderousness.
-- Before untying the end tail, I sometimes put a temporary piece of masking/ blue tape over the loops at the top of the jig to keep the tension even while the end is untied--
Centering the warp tail at the end
Tying off after winding around bottom beam
3. Supplementary Warp #2
Note: there should be 12 - 18 inches between the top of your jig and the top of the loom. This allows you to get a good shed to the top of your tapestry which is, after all, the point of this whole enterprise.
a. Wind more fly line backing onto a bobbin if necessary
b. Tie the end to the top beam of the loom
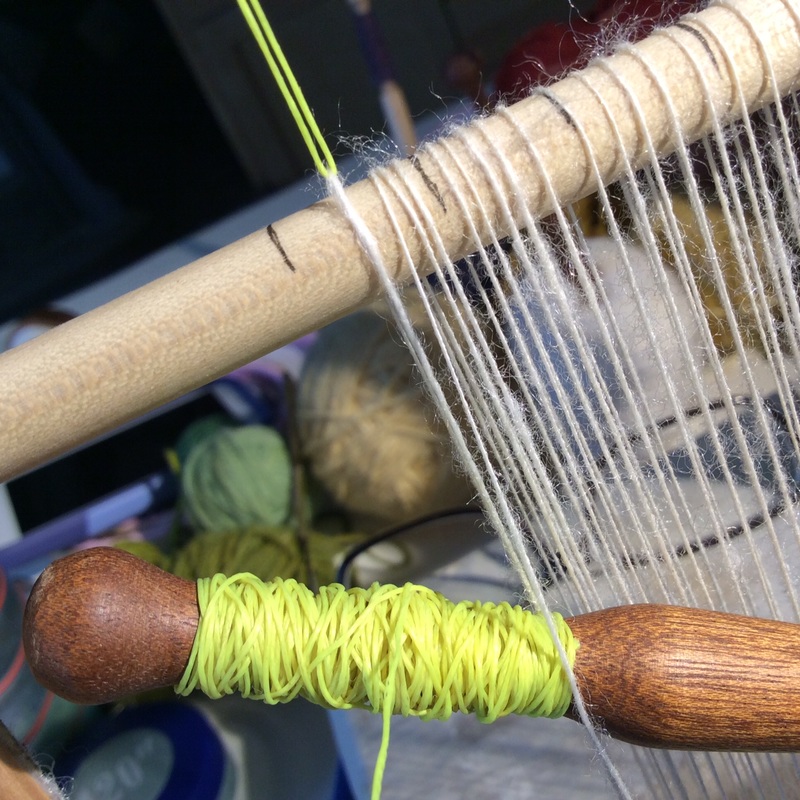
Supplementary Warp #2 tied to top beam of loom
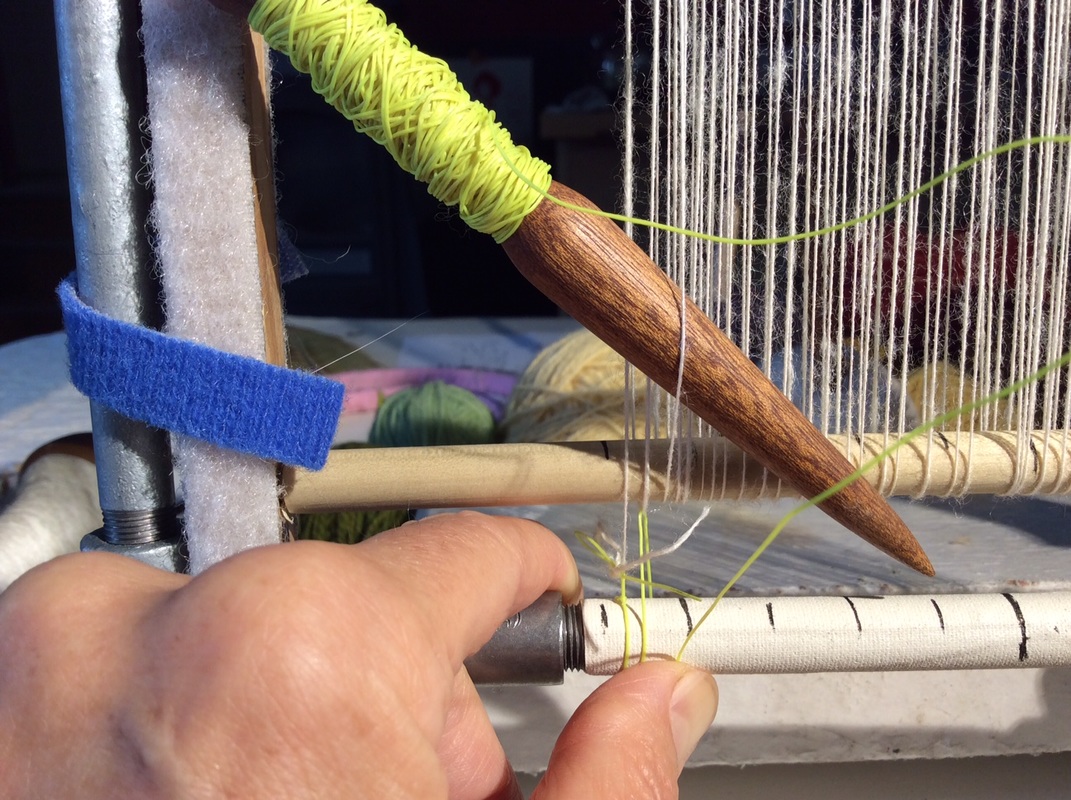
c. Bring the supplementary warp down, scoop up a loop of warp at the top of the jig,
bring the bobbin back up and over the top of the loom. Repeat across
--this is just like what you did with supplementary warp #1 only with longer strands and without the tension tension of the loose tails at beginning and end--
bring the bobbin back up and over the top of the loom. Repeat across
--this is just like what you did with supplementary warp #1 only with longer strands and without the tension tension of the loose tails at beginning and end--
Scooping loops with the supplementary warp #2
d. Tie to top of loom
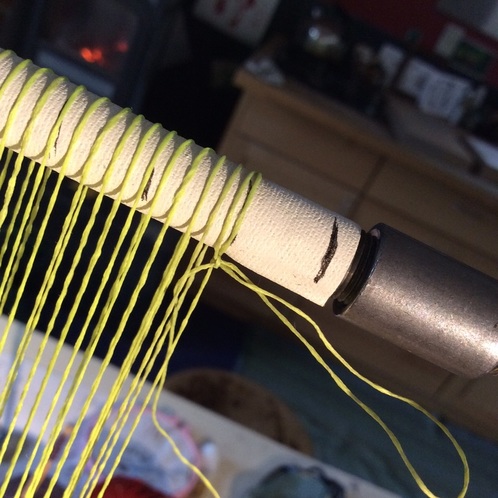
End of Fly Line Backing Tied to Top Beam of Loom
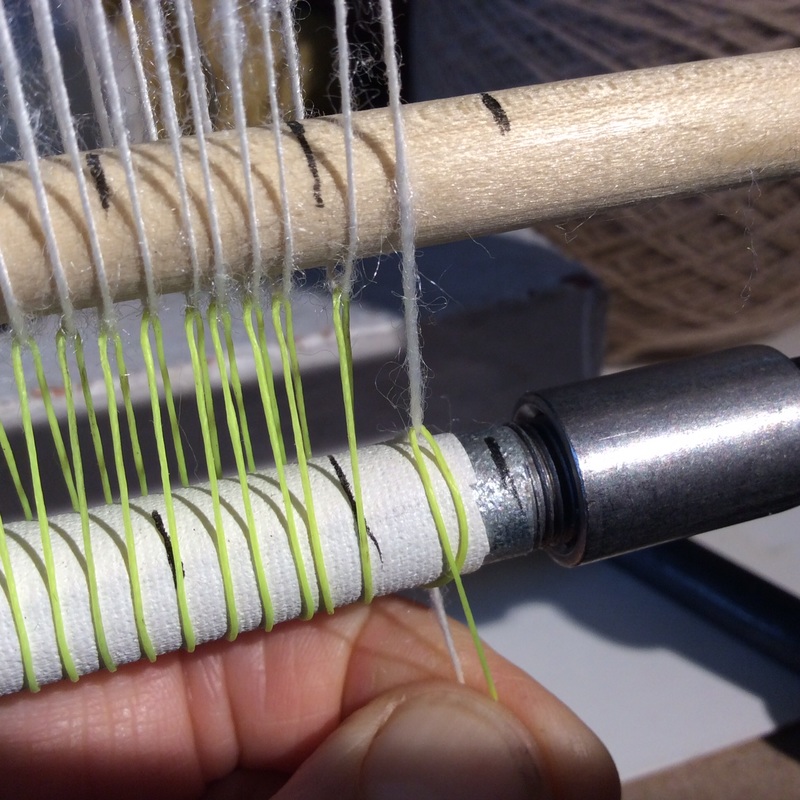
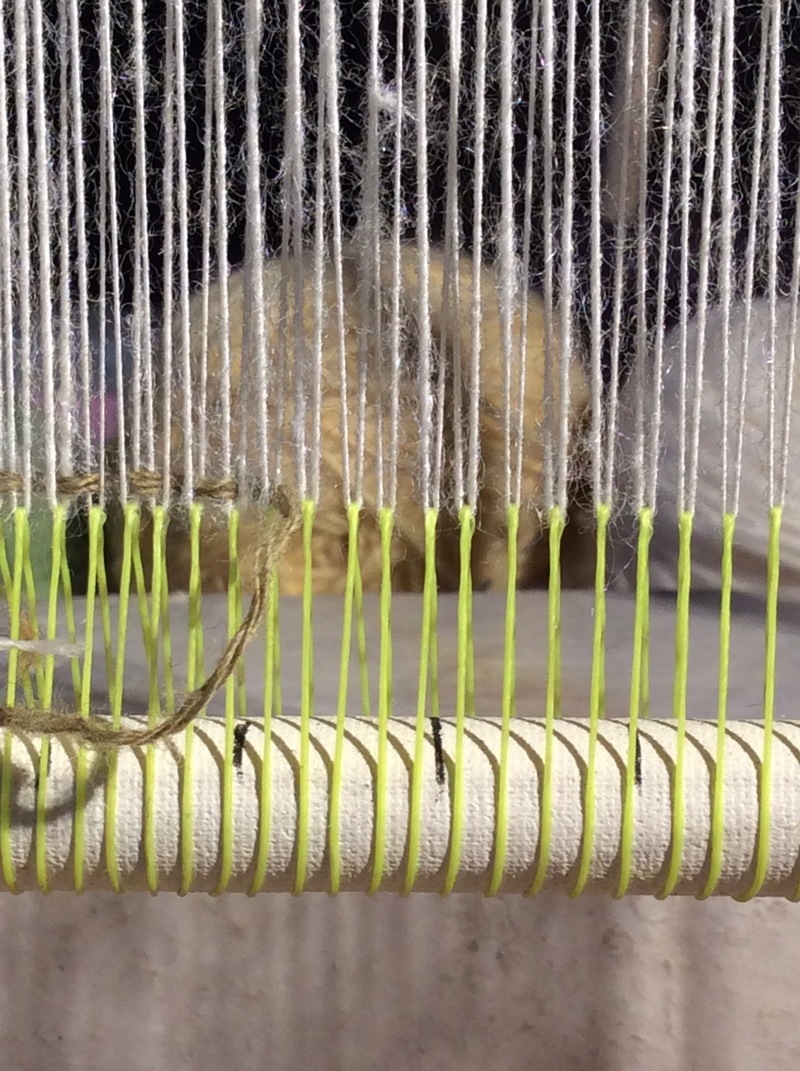
e. CHECK to make sure you have grabbed every loop at both top and bottom of jig.
If you have missed one, fix it either by redoing or by making an an individual loop of fly backing for the missed warp (much the easiest choice)
If you have missed one, fix it either by redoing or by making an an individual loop of fly backing for the missed warp (much the easiest choice)
Actual Warp Lashed to the loom at top and bottom, just before removing jig.
4. DISMANTLE and REMOVE JIG
a. Add tension as warp will be floppy
 Warp can be twisted and messy looking after jig comes out. Tension helps as does thrumming your finger across the warp, or teasing the twisted strands apart. Some warps become more twisted than others. | 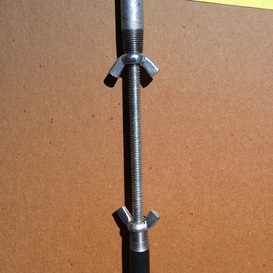 Wing Nuts: such an easy tension mechanism. |
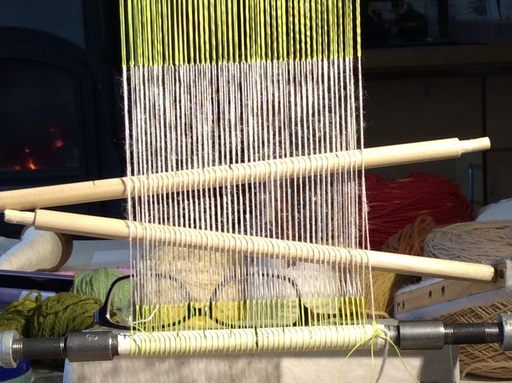
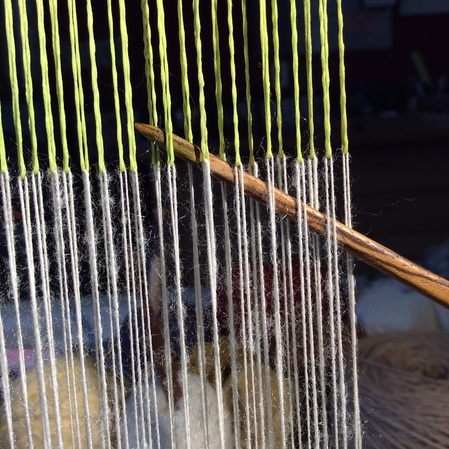
5. Weave in Shed Sticks
— you can see that each warp end consists of two strands together--
— you can see that each warp end consists of two strands together--
6. Add Guide Strings if you like them
-Once upon a time I thought I didn't need them but have since become addicted to the ease of having a constant visual selvedge reference, esp. on small work where slight variation is so obvious--
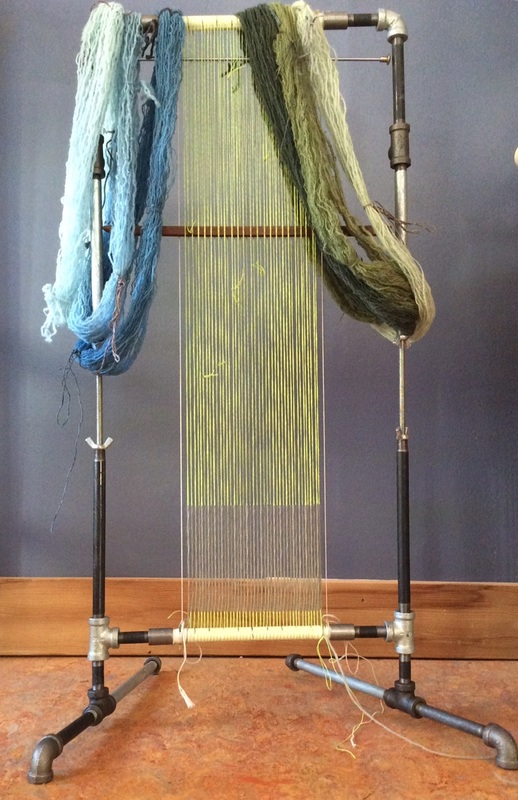
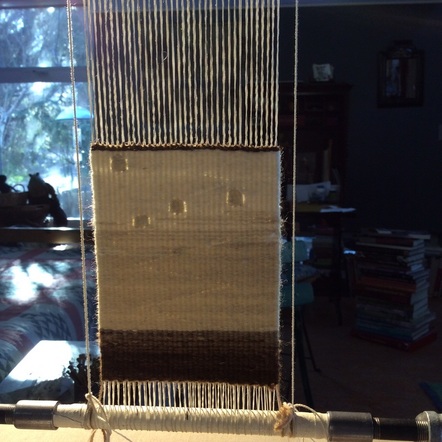
7. Weave your tapestry.
-Once upon a time I thought I didn't need them but have since become addicted to the ease of having a constant visual selvedge reference, esp. on small work where slight variation is so obvious--
7. Weave your tapestry.
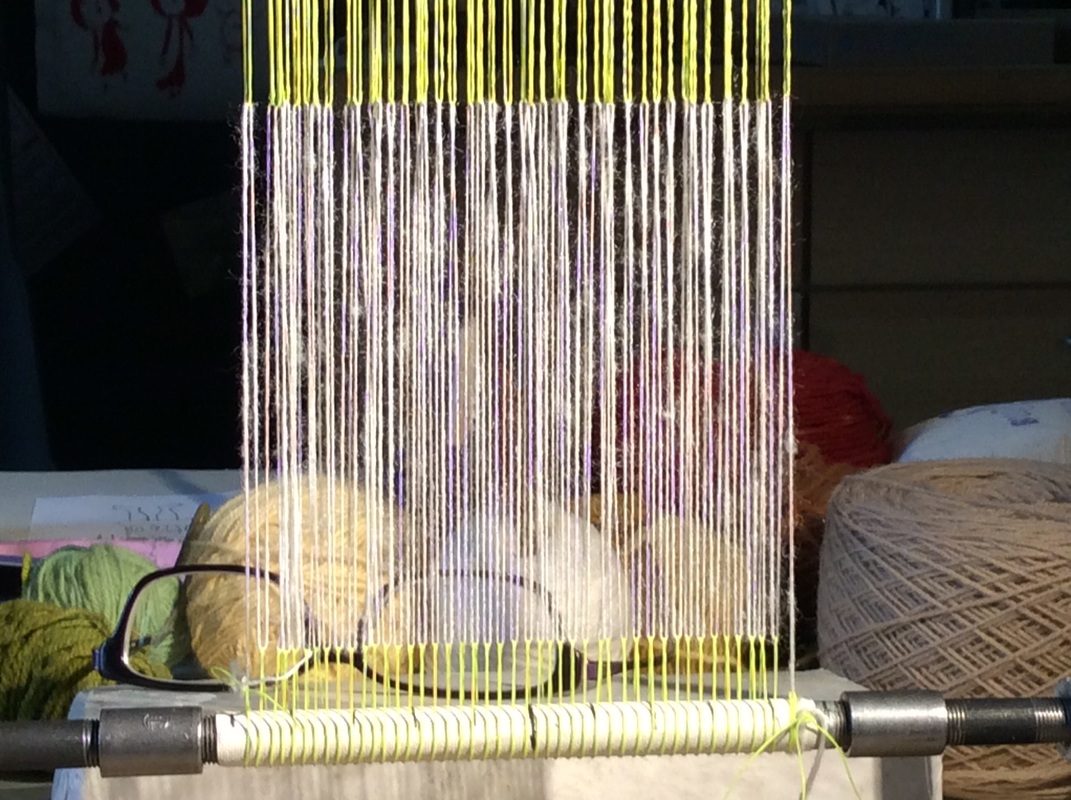
The first pass settles neatly into the loops of the continuous warp
After a few passes the warp loops become almost invisible.
Weave as you would with any other warp, fixed or continuous,
treating the top supplementary warp like an extension of your actual warp
which, though temporary, it actually is.
treating the top supplementary warp like an extension of your actual warp
which, though temporary, it actually is.
 |  |
FINISHING
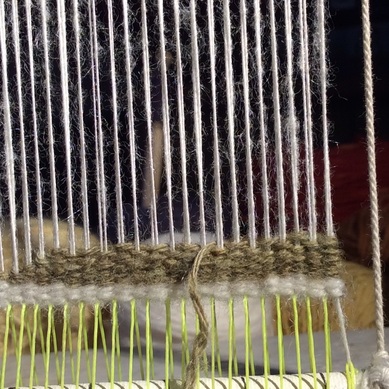
8. Build your tapestry until the weft is slightly above the top of the loops of the actual warp. Ideally, you will have to press gently down on the weft to access the loops
9. Remove Shed sticks
8. Build your tapestry until the weft is slightly above the top of the loops of the actual warp. Ideally, you will have to press gently down on the weft to access the loops
9. Remove Shed sticks
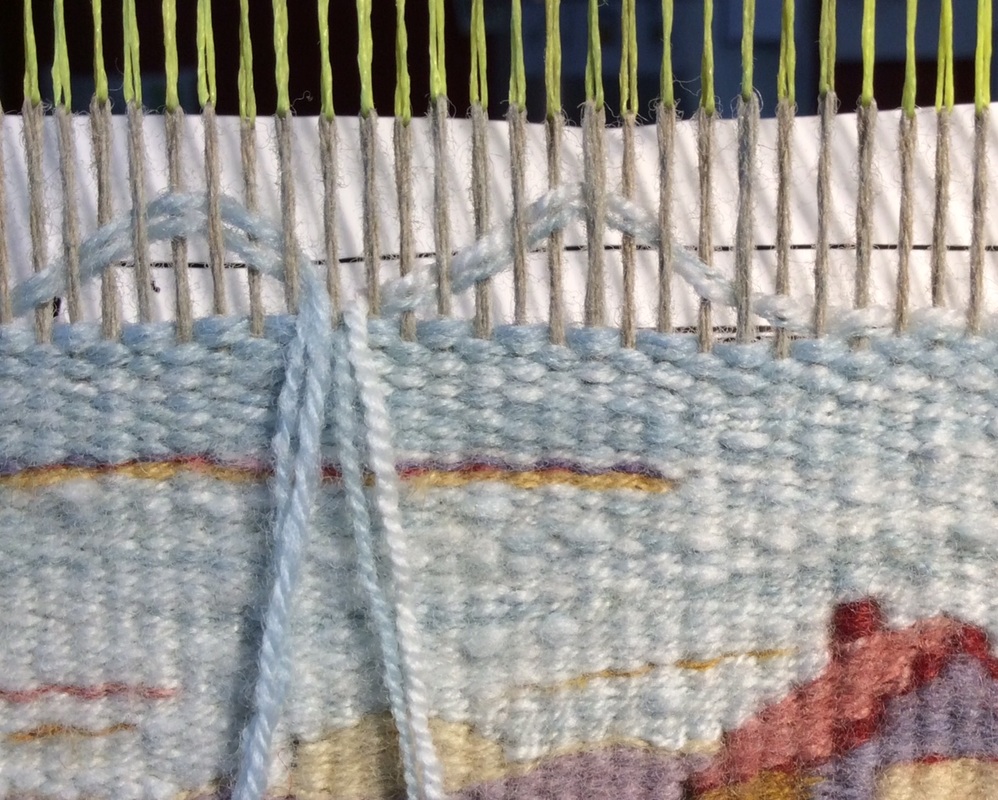
10. Lock the tapestry in place
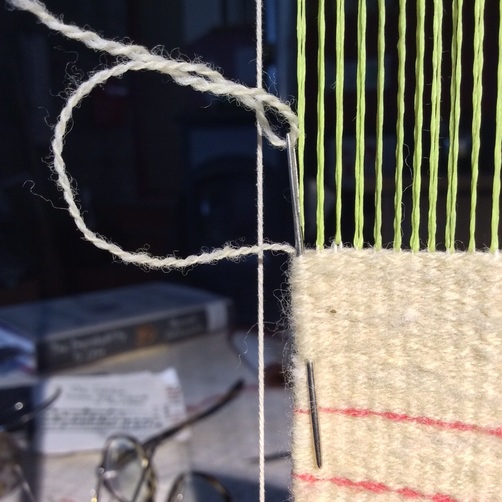
a. Select a piece of yarn several inches longer than the width of your warp.
--This could be the weft you are using if it is strongish, or a piece of the actual warp, if it is wool--
Thread it on a blunt needle and either bury the end in the body of the tapestry or leave it dangling to weave in later.
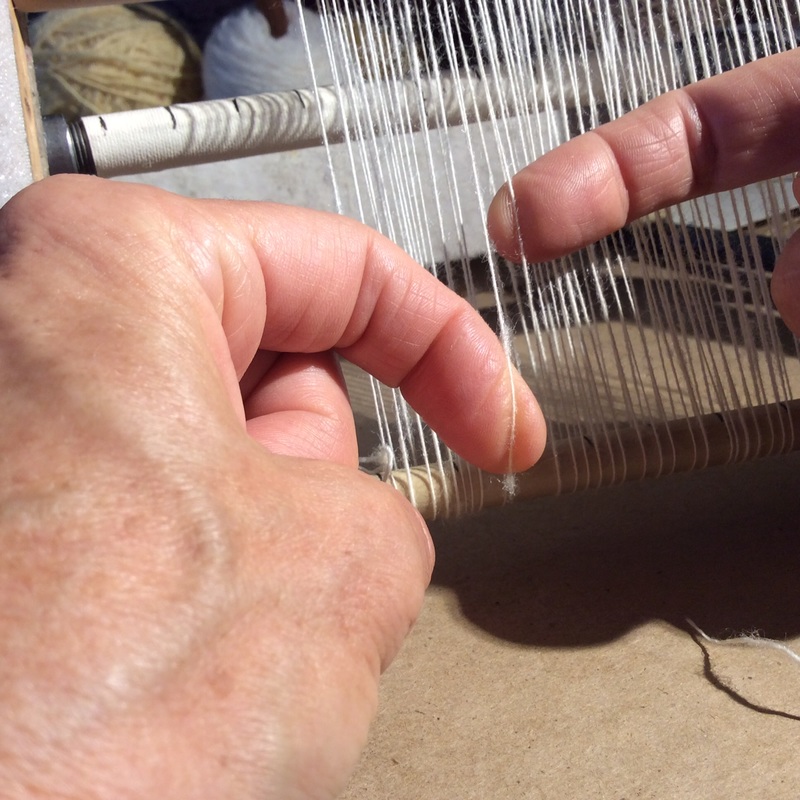
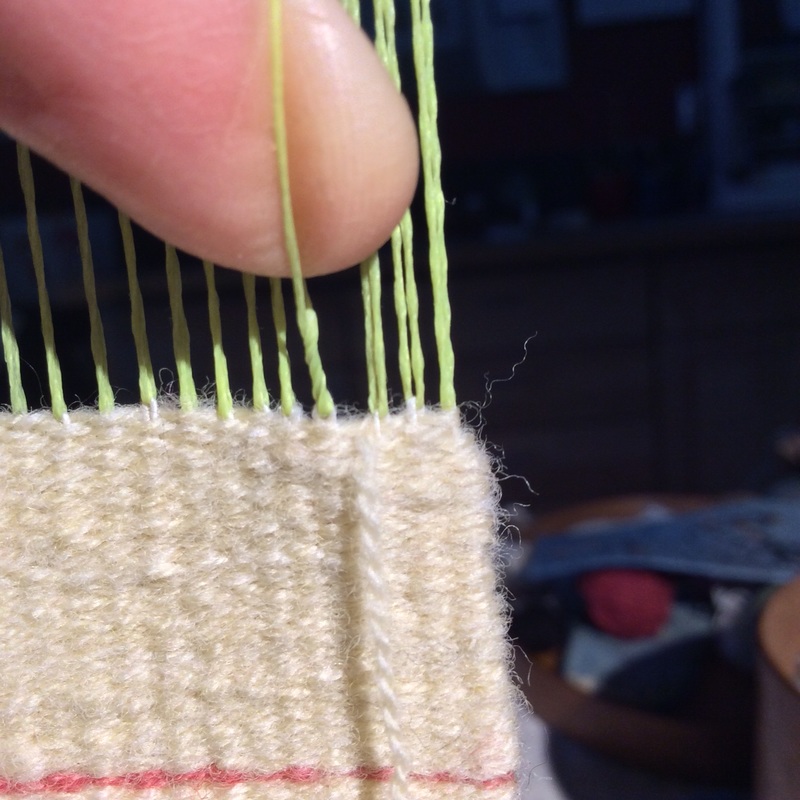
b. Untwist each supplementary warp loop
then slide the needle through the Actual Warp loop.
Run your finger down between each strand of supplementary warp to remove the twist that has accumulated as pictured below. The twist will go into the actual warp.
-- Not every bit of twist has to be gone, but removing a highly twisted supplementary warp is harder than an untwisted one and can put undesired pressure and friction on your actual warp loops--
(See next three photos for details).
a. Select a piece of yarn several inches longer than the width of your warp.
--This could be the weft you are using if it is strongish, or a piece of the actual warp, if it is wool--
Thread it on a blunt needle and either bury the end in the body of the tapestry or leave it dangling to weave in later.
b. Untwist each supplementary warp loop
then slide the needle through the Actual Warp loop.
Run your finger down between each strand of supplementary warp to remove the twist that has accumulated as pictured below. The twist will go into the actual warp.
-- Not every bit of twist has to be gone, but removing a highly twisted supplementary warp is harder than an untwisted one and can put undesired pressure and friction on your actual warp loops--
(See next three photos for details).
 Pressing twist down into tapestry | 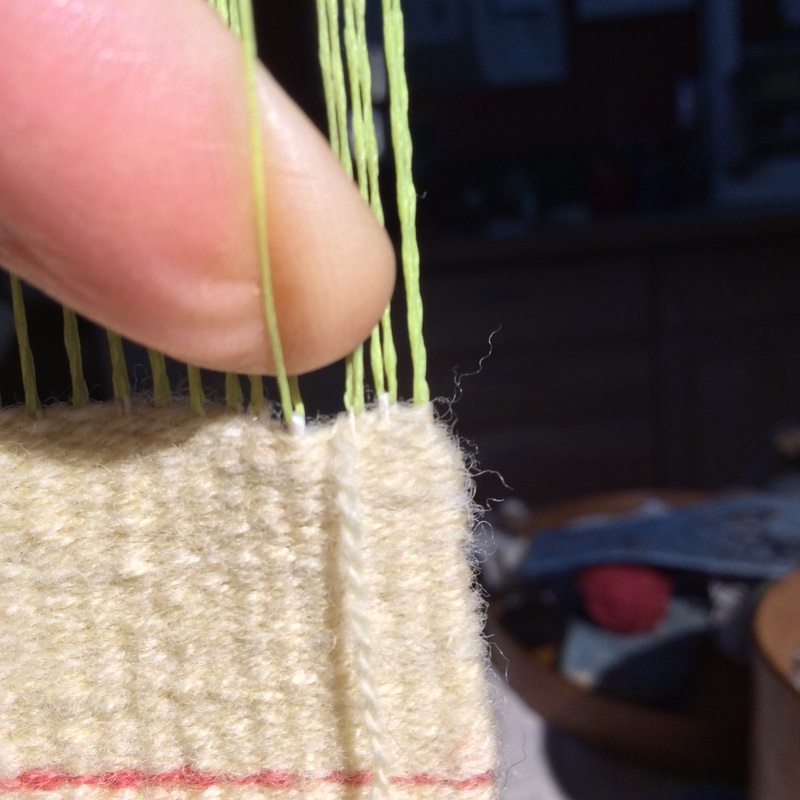 No twist in supplementary warp |
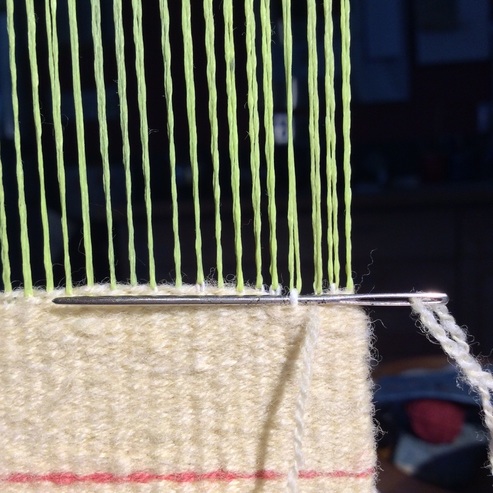
needle slides through loop of Actual Warp
c. Repeat across top of warp
CHECK to make sure you have caught all the loops
d. Bury the end in the body of the tapestry, or leave dangling to sew in later
CHECK to make sure you have caught all the loops
d. Bury the end in the body of the tapestry, or leave dangling to sew in later
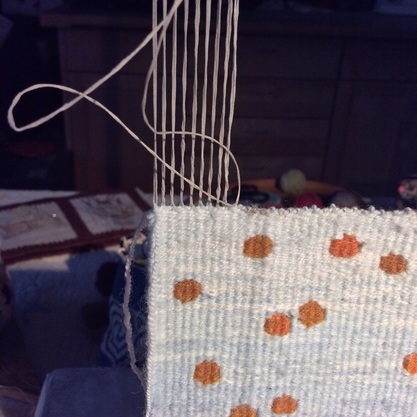
 4 selvedge tapestry ready to be removed from the loom
 11. Release the Tapestry
a. Untie the end of supplementary warp #2 from the top of the loom and pull it out of the loop at the top of the tapestry.
--Pull GENTLY — if you yank you could potentially snap the loop. This is fixable, but not desirable--
b. Continue across.
If you come to a knot, snip it.
--As you free the loops of the tapestry, the strand of removed supplementary weft will become awkwardly long, so even if there are no knots yet (on your first one for instance), you’ll eventually want to cut the fly line backing. You can tie the ends together using an overhand knot looped twice. Test the knots for strength the next time you make a supplementary warp.
c. Repeat at the bottom, removing supplementary warp #1
I have a video of this on my Instagram Feed (@sarahcswett)
d. Your tapestry is now free.
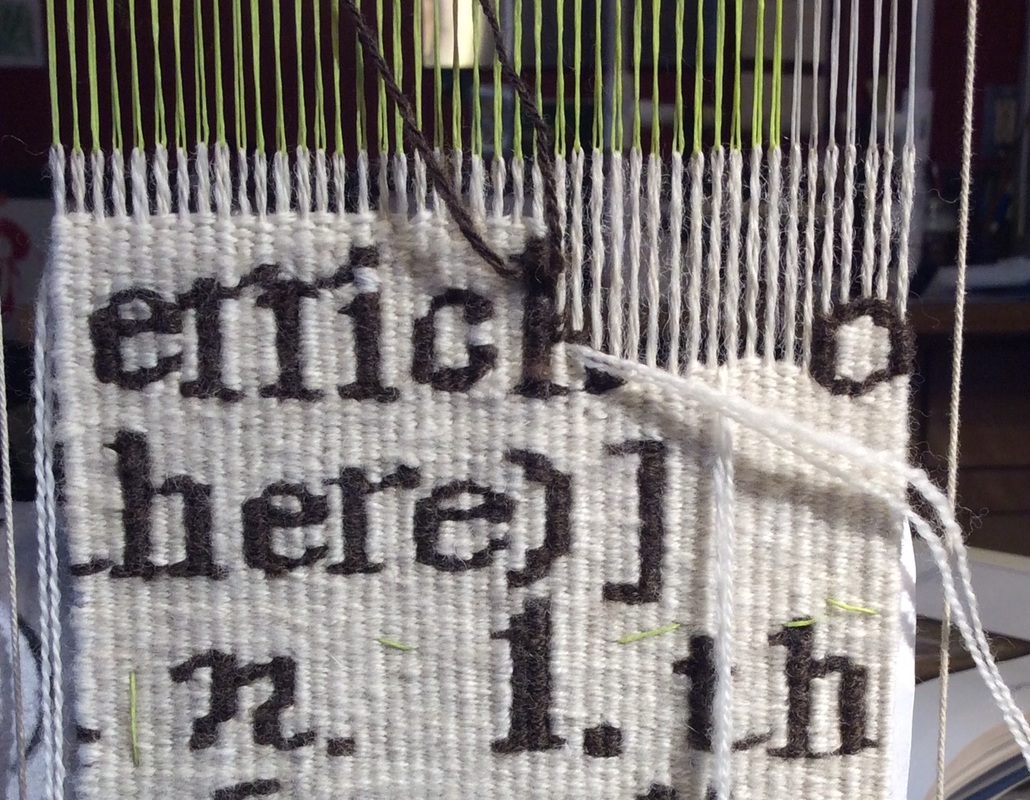
12. Weave in tails.
13. Let your tapestry rest.
14. Wash or steam or whatever it is you do to finish.
15. Put on another warp.
13. Let your tapestry rest.
14. Wash or steam or whatever it is you do to finish.
15. Put on another warp.
Appendix:
More on Warp Yarn, Looms and Jigs
1. Fine, strong warp — definition of fine is loose. Experiment.
I generally weave at a sett of 8 - 10 epi.
Yarn I’ve used:
Brown Sheep Weaver’s Warp (1,100 yards per pound)— a singles
Brown Sheep Fingering 2 ply at 2800 yards per pound
(yes, it is knitting yarn but if you're gentle it works well for very small tapestries).
Handspun in a variety of weights — usually two ply at 2-3000 yards per pound,
Romney, Coopworth, Lincoln, Wenslydale or some other strong fleece is recommended to start.
Cotton seine twine works and is popular, but I don’t use it for tapestry so can’t speak to what size would be appropriate. Wool is my warp fiber of choice for a number of reasons, not least how good it feels on my fingers.
2. Cord for supplementary warp
My favorite: Fly Line Backing
— very fine, very strong, slightly waxy so holds tension well and is easy to remove--
Fine Seine twine works here too but in my early experiments I found that it wore out after only a few uses (snapping at inappropriate moments), and as I said above it annoys my hands.
But you get to experiment and make up your own mind.
And do me (and others) know what you discover.
3. and 4.
LOOMS and JIGS
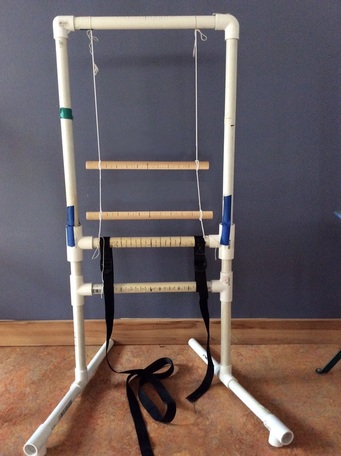 3/4" PVC Loom (12" wide) with Camping Strap Tension Device; Jig = Dowels held in place with string. | 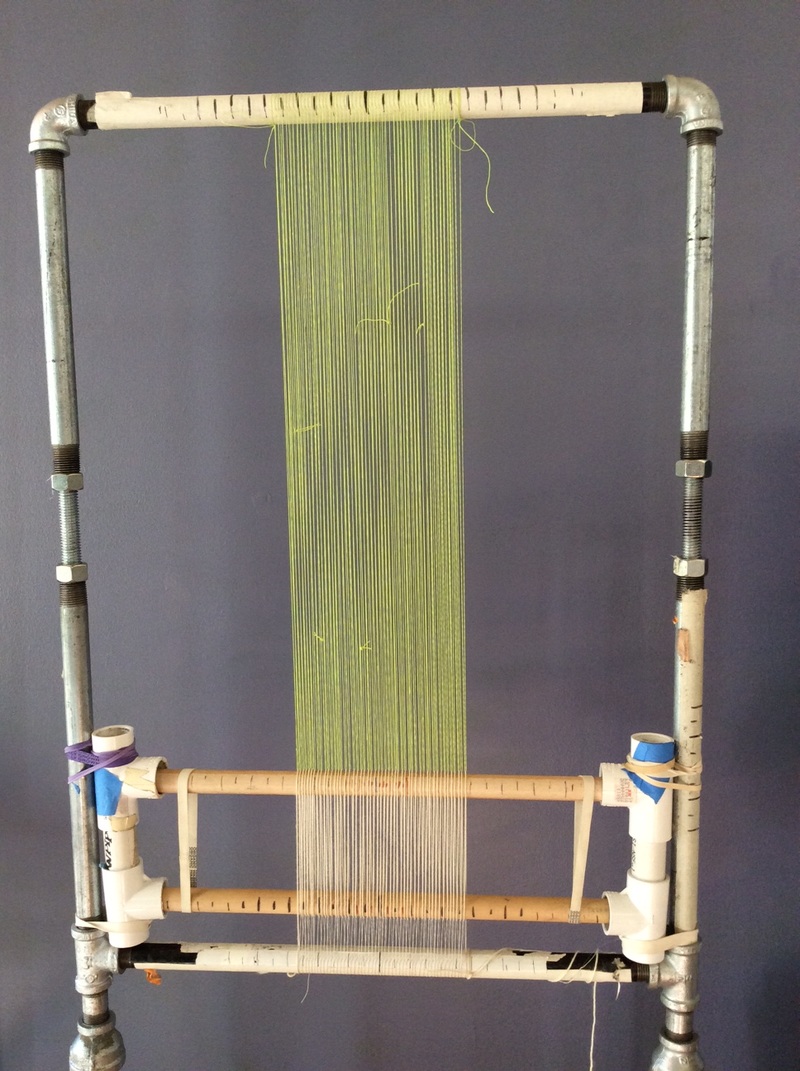 1/2 " galvanized and black pipe loom (18" wide) with a quick-and-dirty-but-remarkably-functional pvc and dowel jig |
3. LOOM with Tension Mechanism
As I've mentioned before, most of my weaving is done on black or galvanized pipe looms
based on Archie Brennan Plans (link below)
For big tapestries I use 1 +" pipe.
The looms pictured here are built of 1/2" or 1/8" pipe
--black and galvanized pipe come in the same sizes so work together though the black is less expensive--
Here are links to Archie's plans
Archie Brennan Style Copper and Archie Brennan Galvanized
(Both sets of loom plans are on this page -- scroll down)
Here are links to inexpensive variations
-PVC version of Archie's Copper Pipe Loom from Vancouver Yarn
-PVC loom with strap tension from Kids Weaving
-Simplified version of PVC Strap Tension Loom as in photo above
Mirrix Looms are also excellent frame looms with adjustable tension.
-- I've never woven on one myself but many of my students swear by them and have used them for four selvedge warps with great success--
A rigid heddle loom genius could probably figure out how to use one for four selvedge warping but as I've never done it, I don't really know. Let me know if you do though!
Jig
-A tied on jig (pictured above left with the PVC Loom)
-A quick and dirty jig using dowels and pieces of PVC Pipe
(pictured above right. Click here or more photos and discussion of this).
-Michael Rohde's Jig (sounds like a dance tune) pictured below and in most of the photos in this blog post. Note that there are several sets of holes in the side bars of this jig so it can be used for a variety of tapestry sizes, or to weave a bunch of tapestries exactly the same size--
-Some cool new variation you just thought of and can't wait to try.
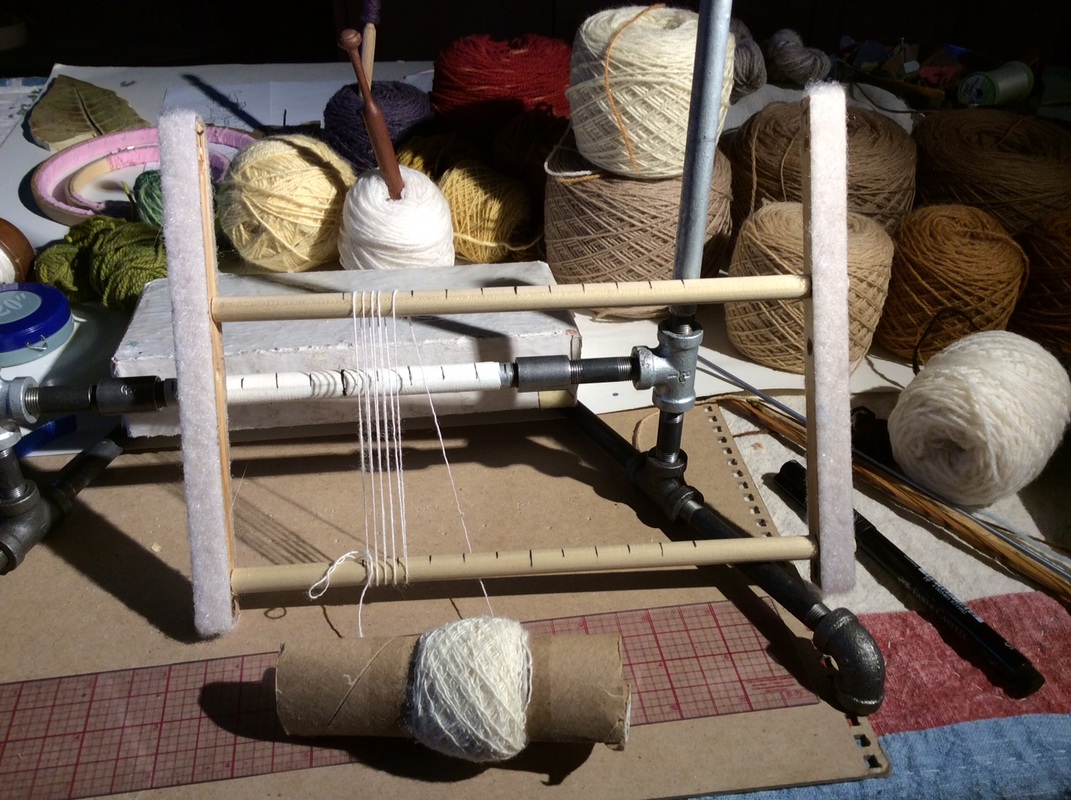
Michael Rohde's Jig with my addition of longer cross bars --slightly too long for their thickness, truth to tell, and with a tendency to bow, so I'm thinking about other possibilities...
So here we are at the end of a very long blog post.
I'm glad to have this out in the world
If you have questions, ask.
Next week, I'll aim for something a teensy bit shorter...
And don't forget to go to Terry Olson's Site
tomorrow (Wednesday, 6 January 2016) on the ATA Blog Tour
Can't wait to hear what she has to say!
I'm glad to have this out in the world
If you have questions, ask.
Next week, I'll aim for something a teensy bit shorter...
And don't forget to go to Terry Olson's Site
tomorrow (Wednesday, 6 January 2016) on the ATA Blog Tour
Can't wait to hear what she has to say!