a field guide to needlework
  • Tapestry
    • 1994 - 1999
    • 2000 - 2003
    • 2004 - 2007
    • 2008 - 2009
    • 2009 - 2012
    • 2013 - 2015
    • 2016 part one
    • 2016 - 2017
    • 2018
    • 2019
    • 2020
    • 2021
    • 2022
    • 2023
    • 2024
  • Newsletter
  • Store
  • Blog 2014-2021
  • About
  • Comics
    • Fatal Distraction
    • Manuscript Revised
    • Stripes
    • Enid and Crow >
      • Enid and Crow: Days In The Life
      • Enid and Crow: The Peregrinations
      • Enid and Crow: Color Choices
      • Enid and Crow: Carried Away
      • Enid and Crow: Somewhere!

Yarn Over Idaho

2/23/2016

 
Picture
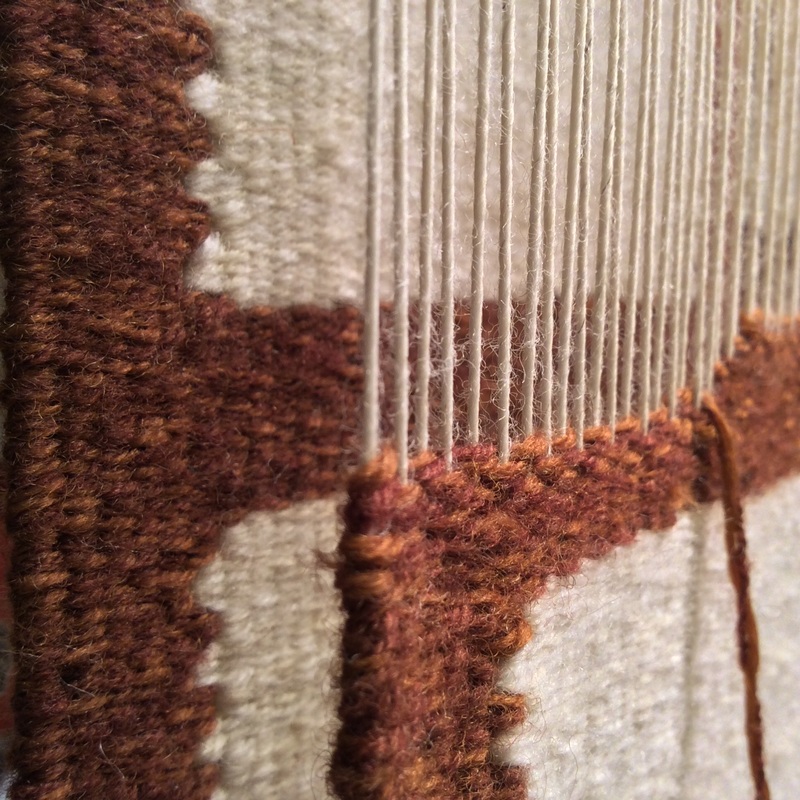
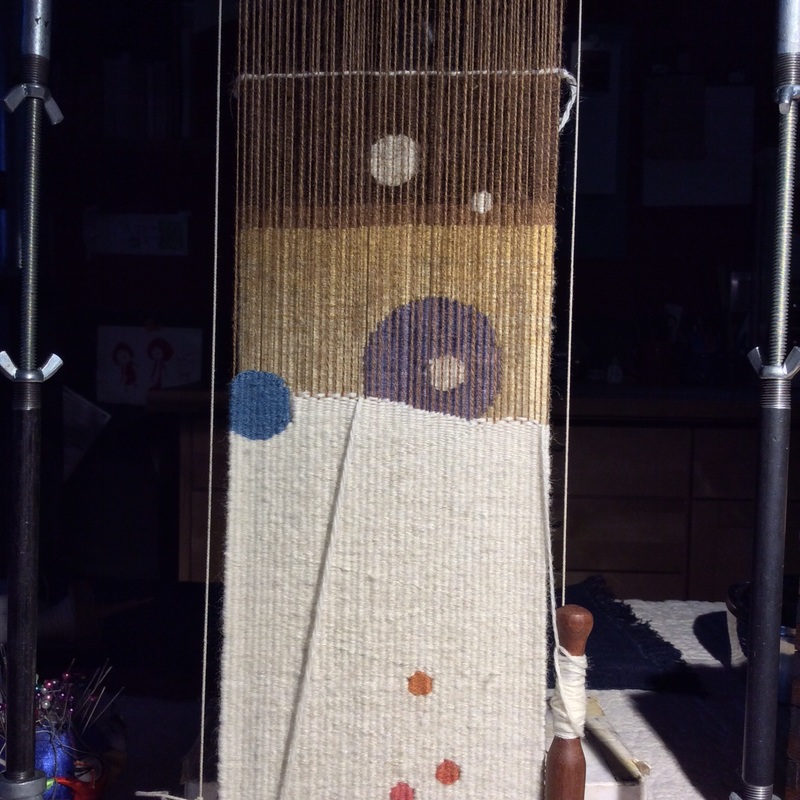
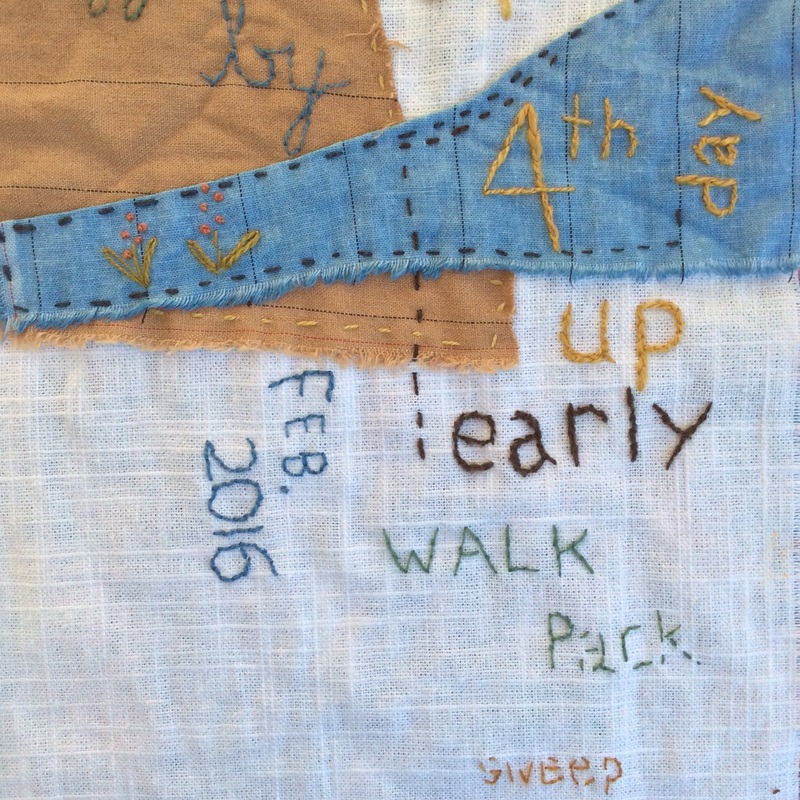
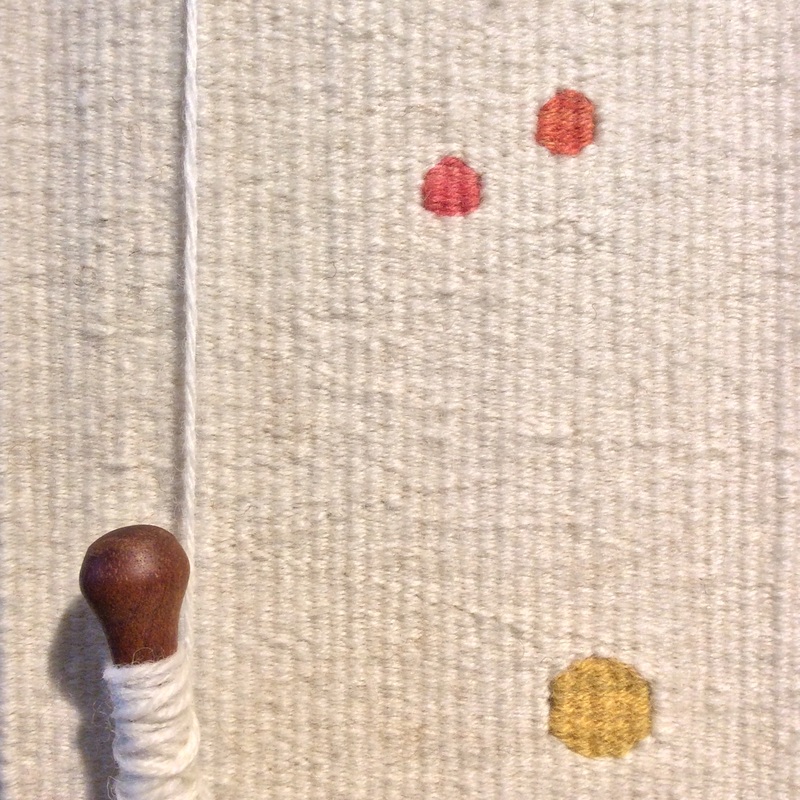
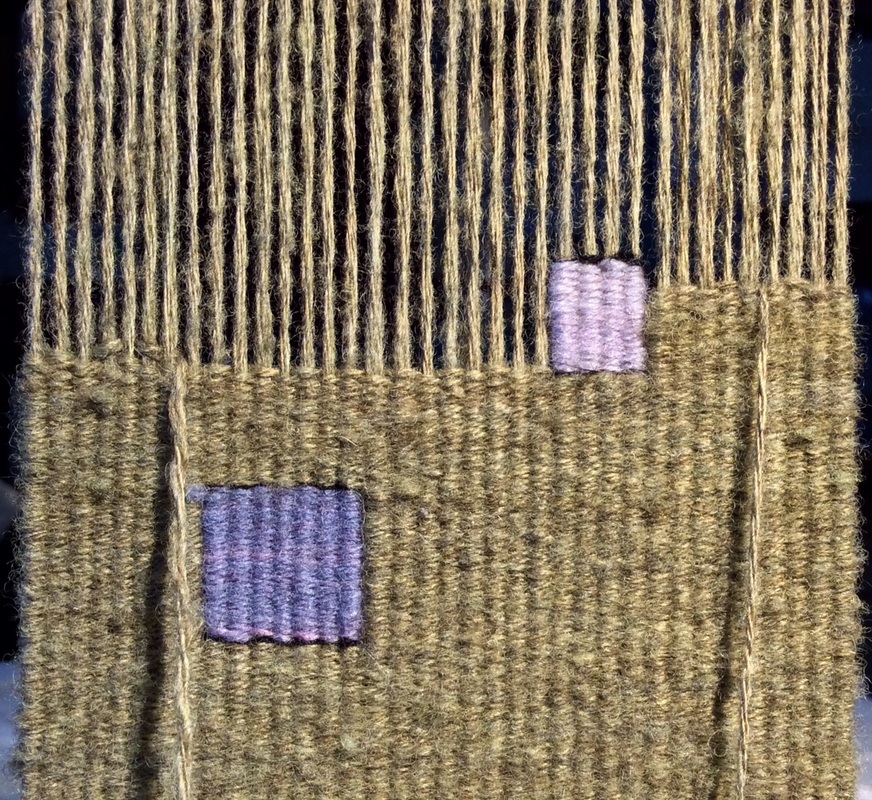
Rising or Falling? (detail in progress)
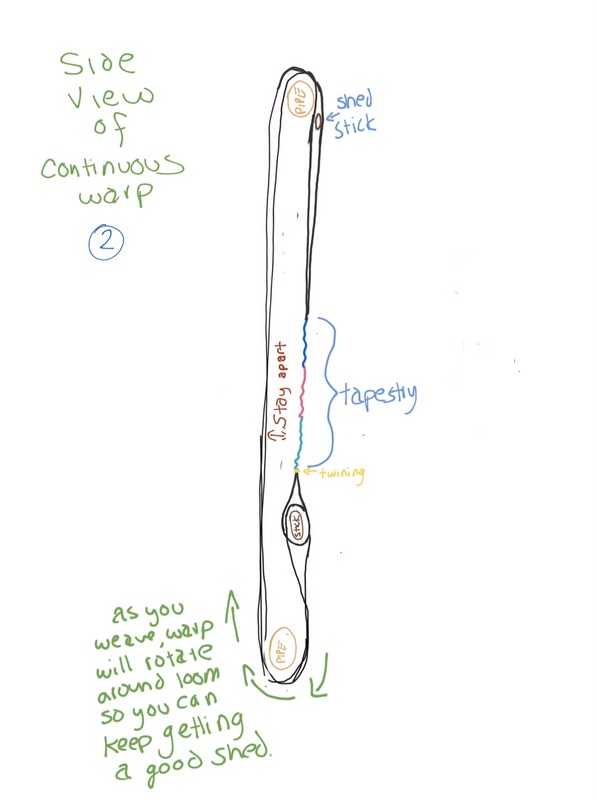
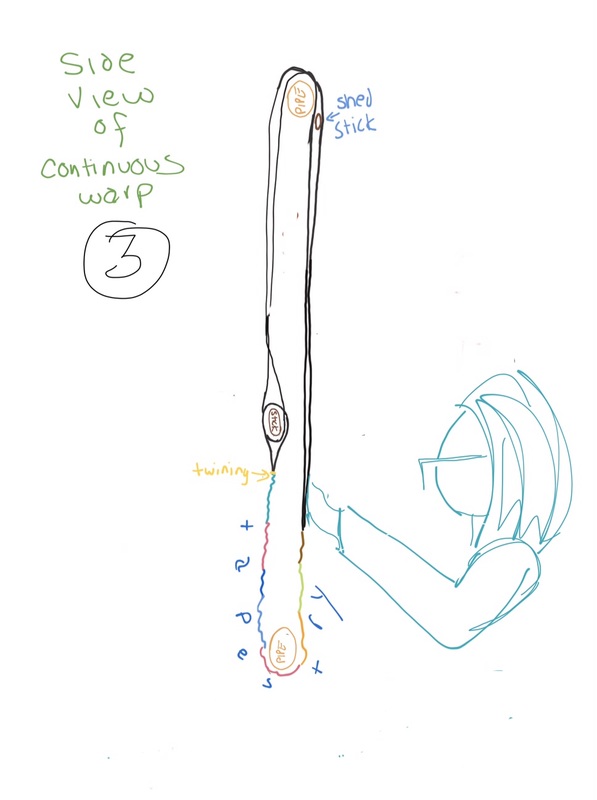
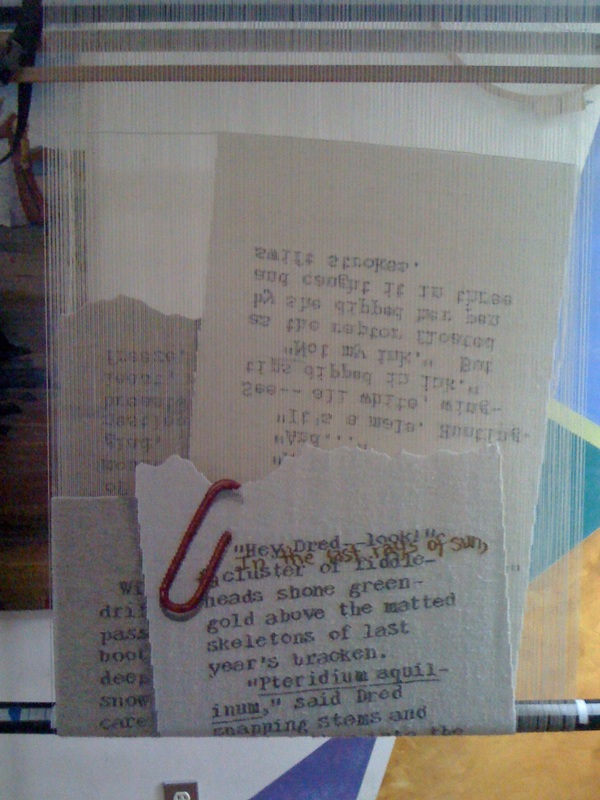
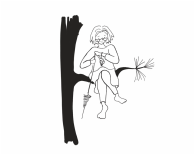
I don't know what to say about the little tapestries I'm weaving right now.
Picture
Picture
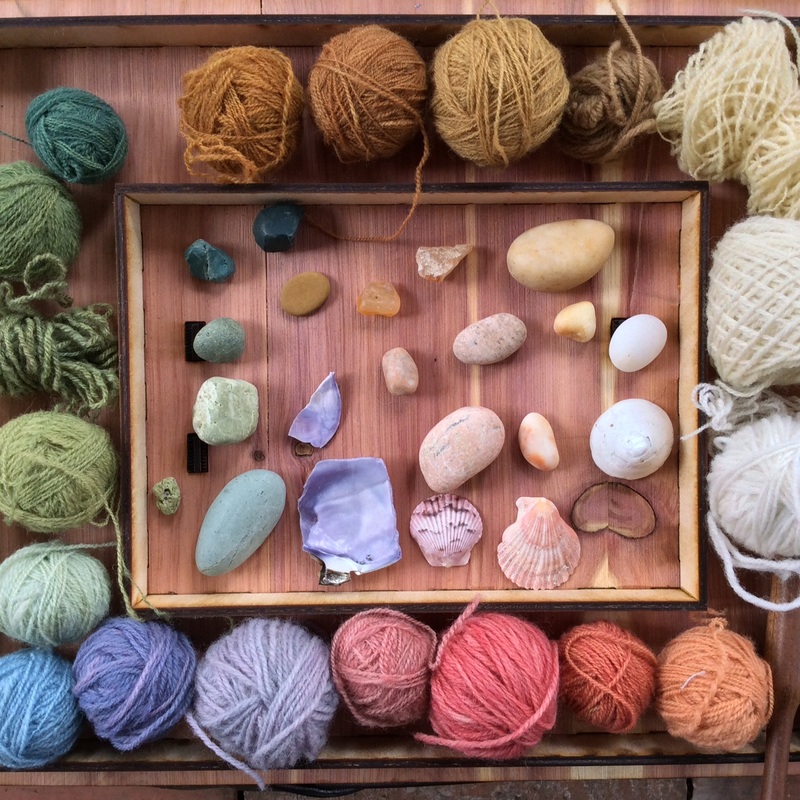
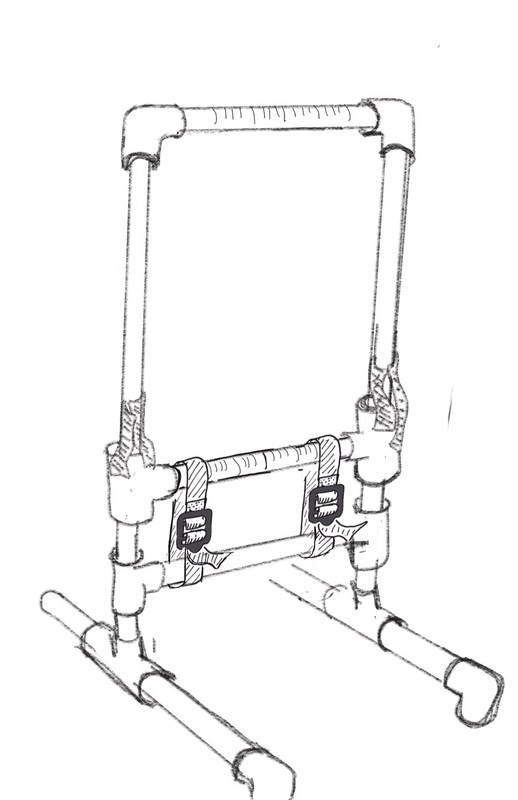
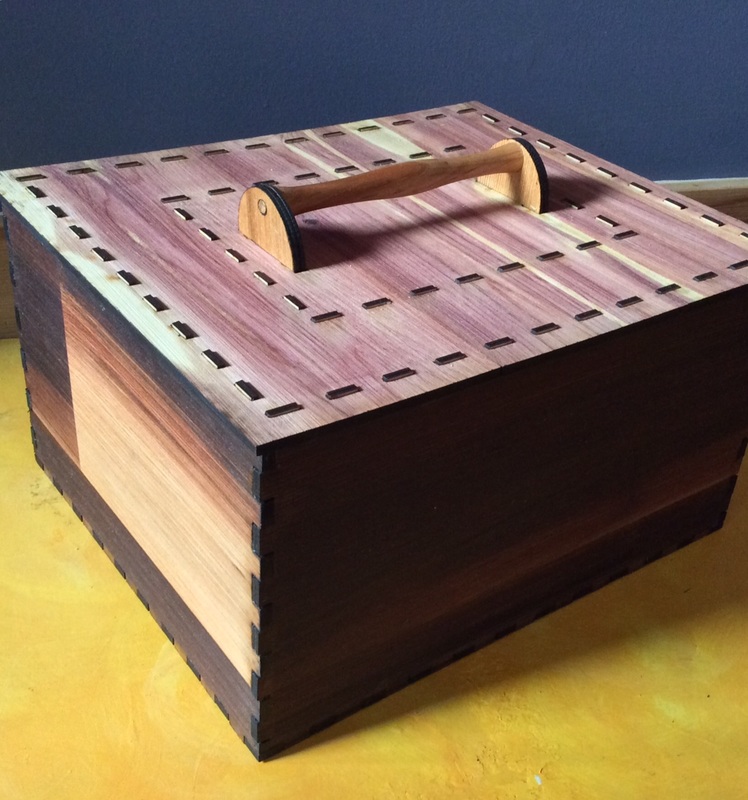
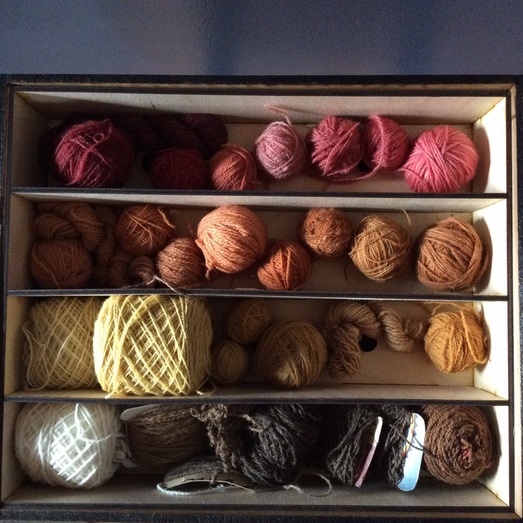
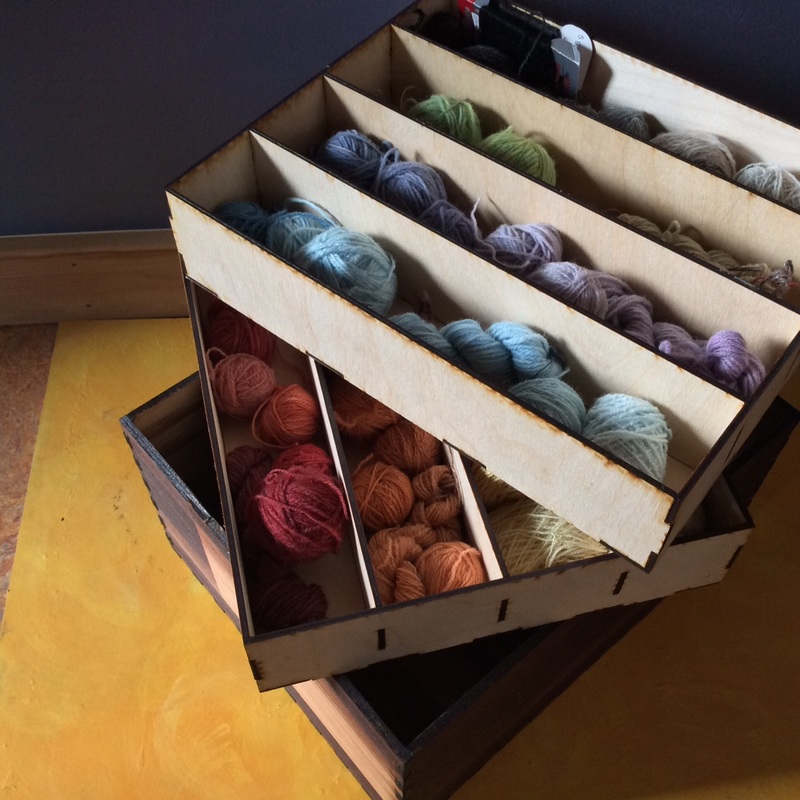
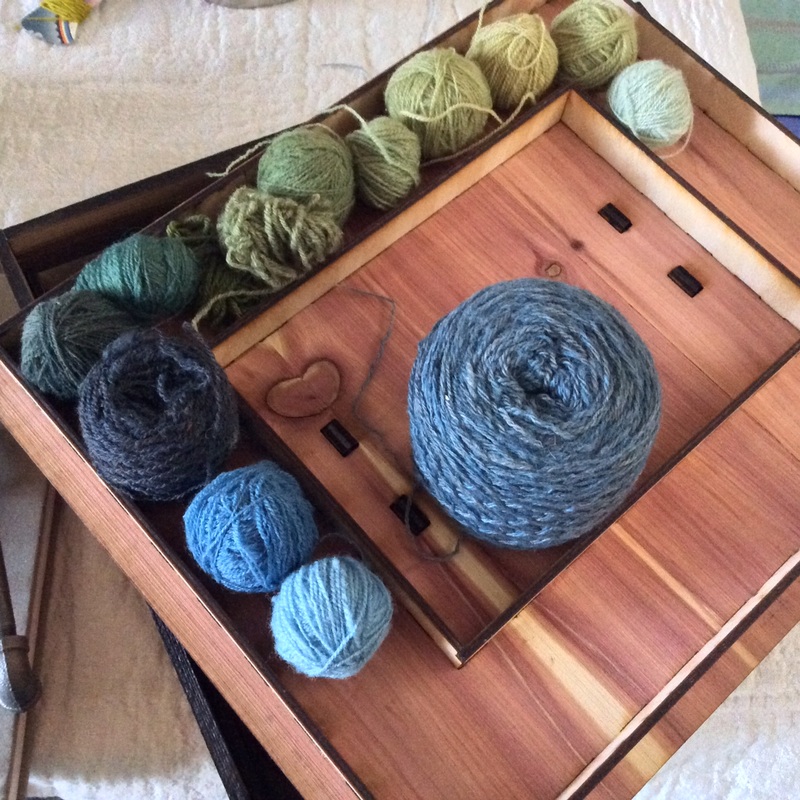
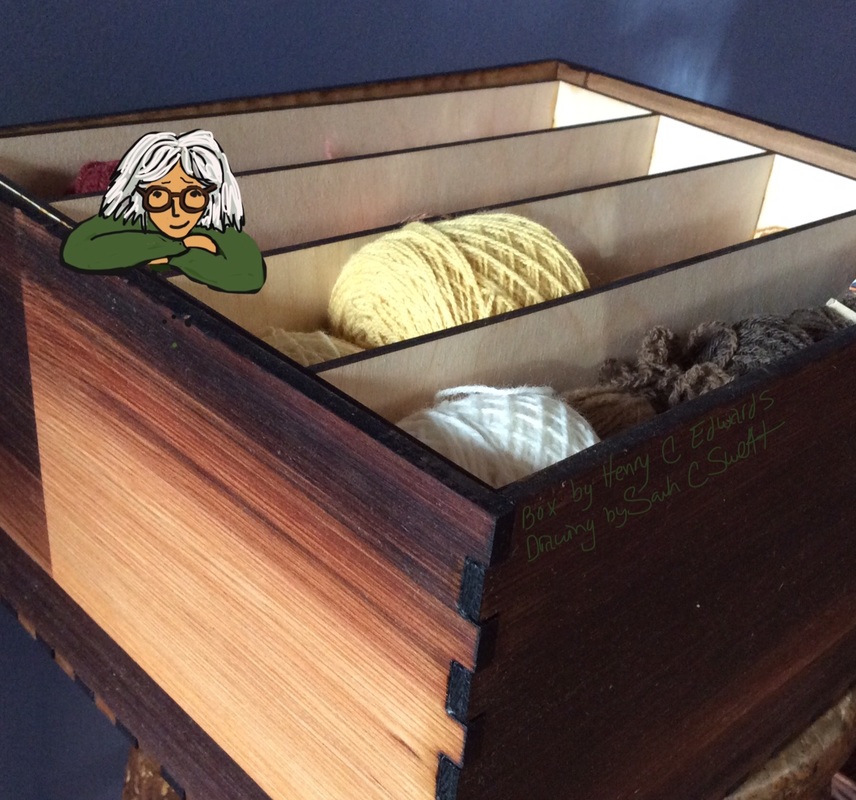
Palette Box by Henry C. Edwards (HCEArtificery on Etsy)
Picture
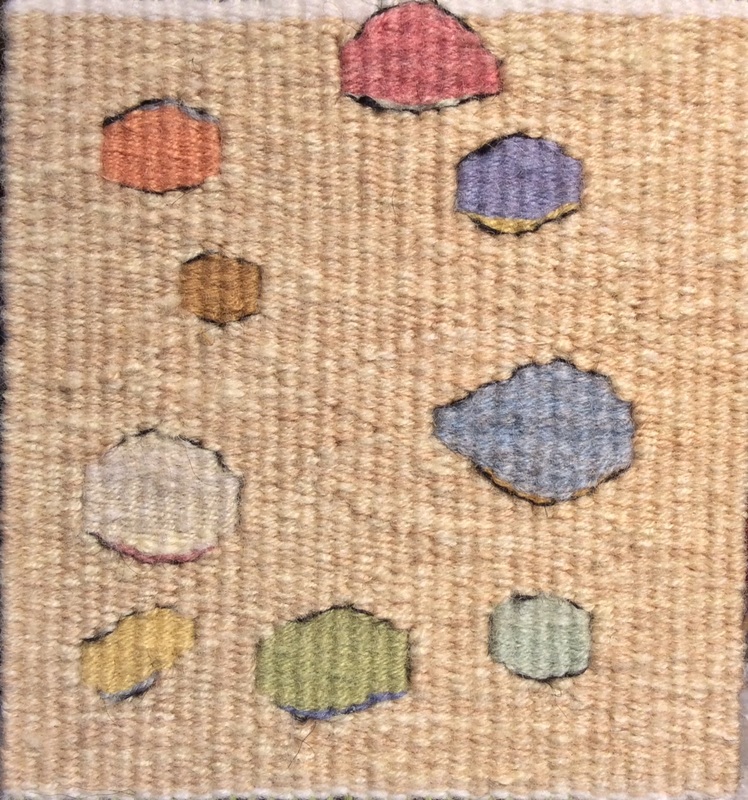
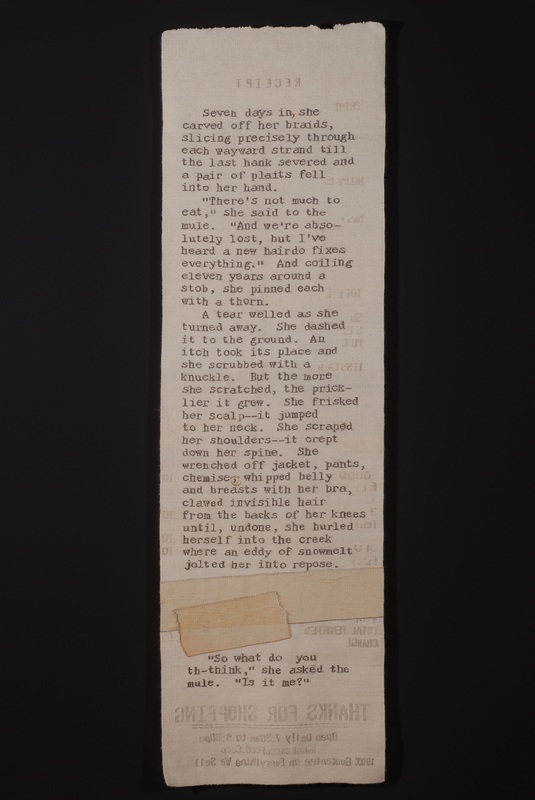
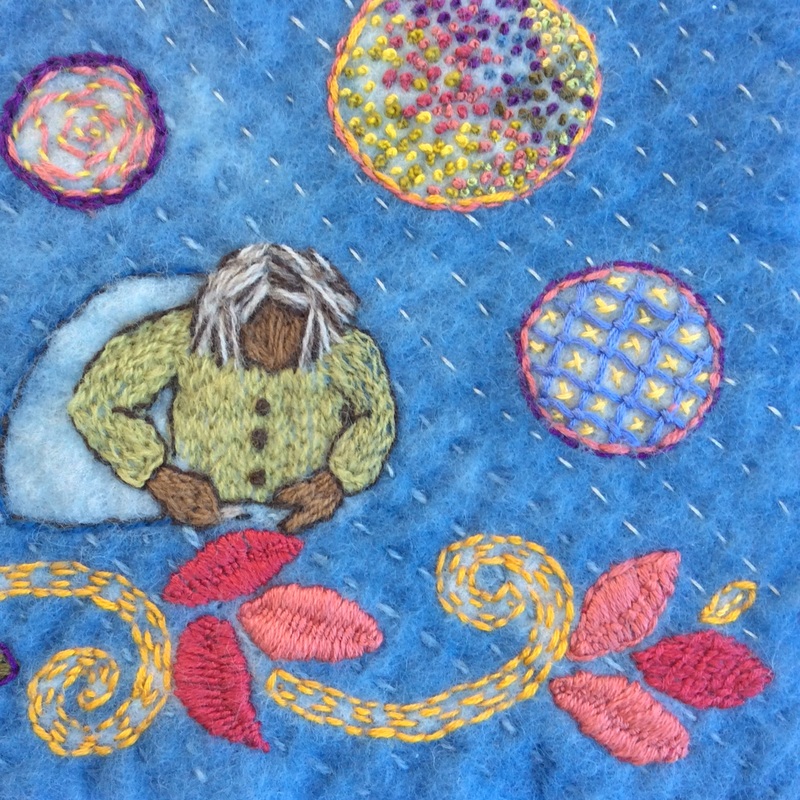
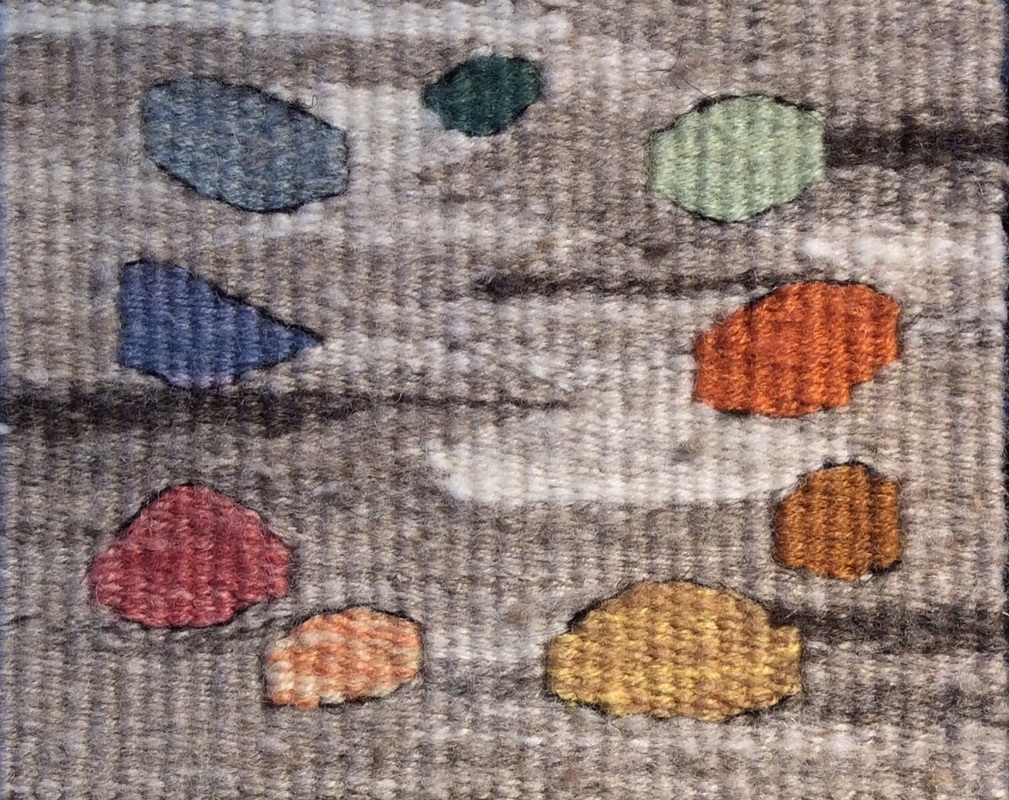
Thought Bubbles; wool warp and weft; natural dyes; 41/2" x 4" ©Sarah C. Swett 2016
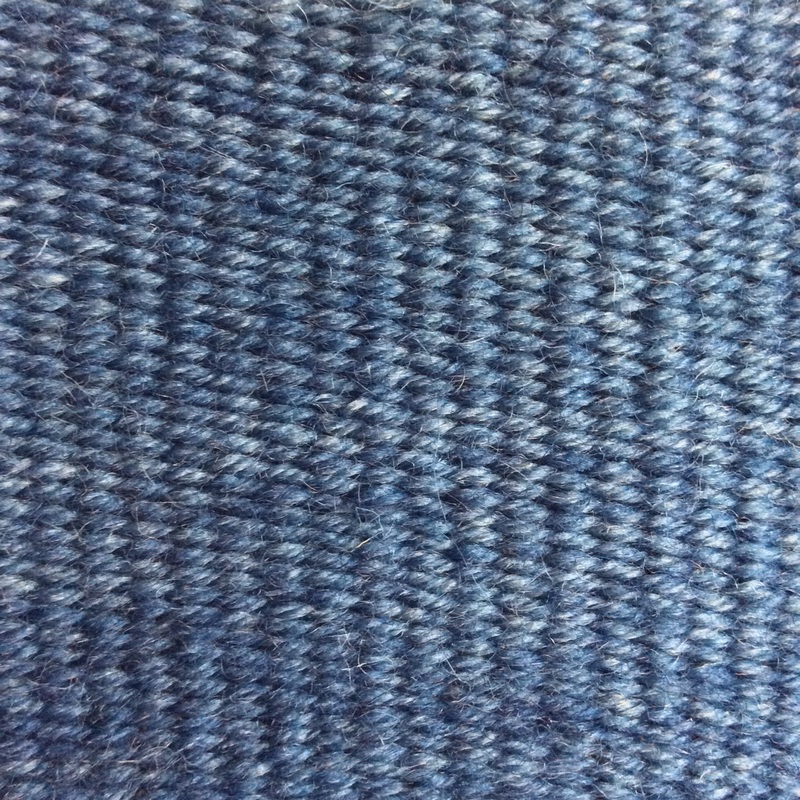
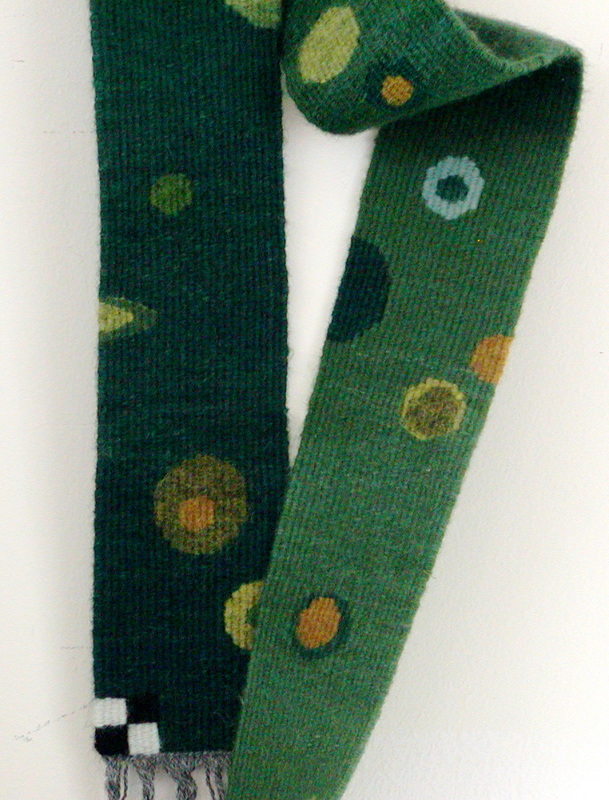
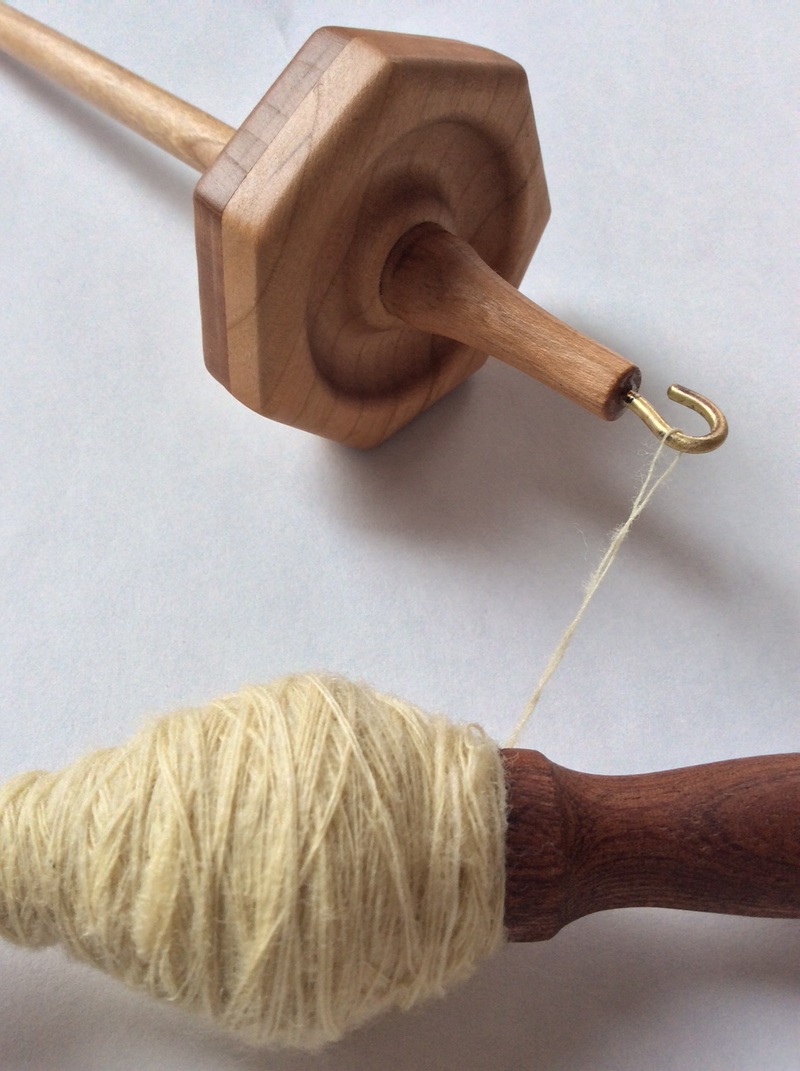
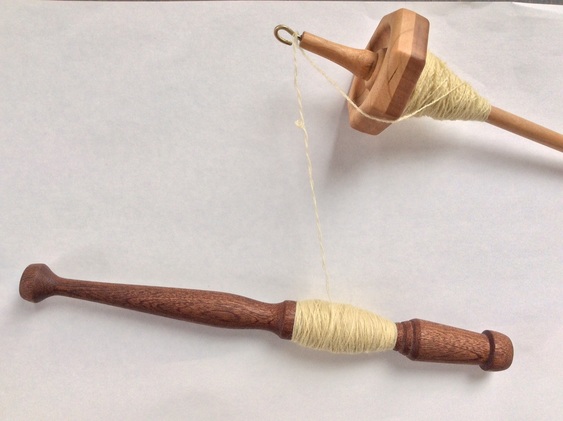
Picture
Weft Faced Indigo.
Picture
So I guess I'll just hold on tight and let them go where they will.
Picture
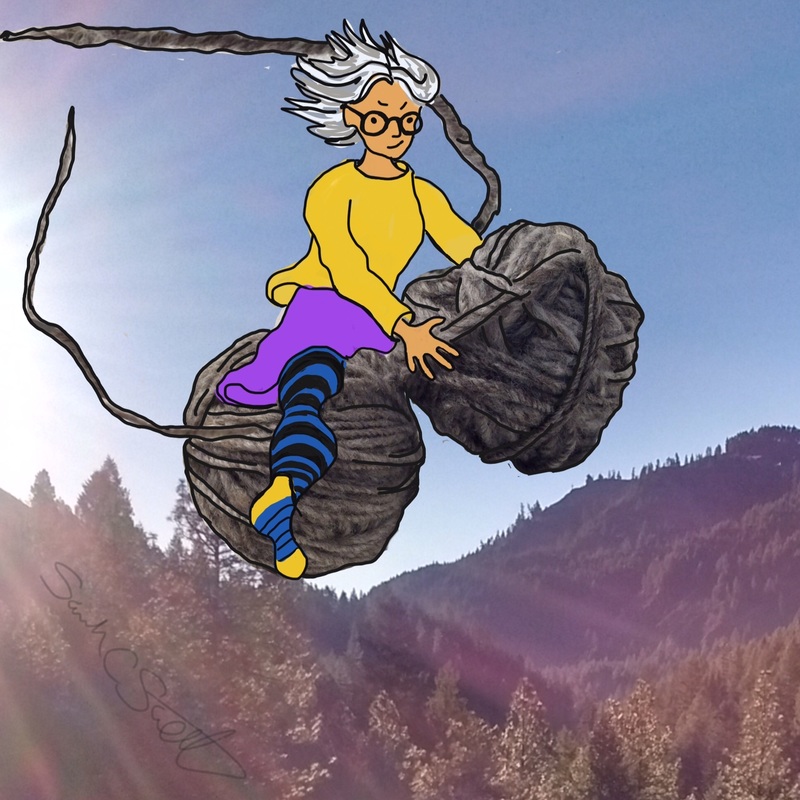
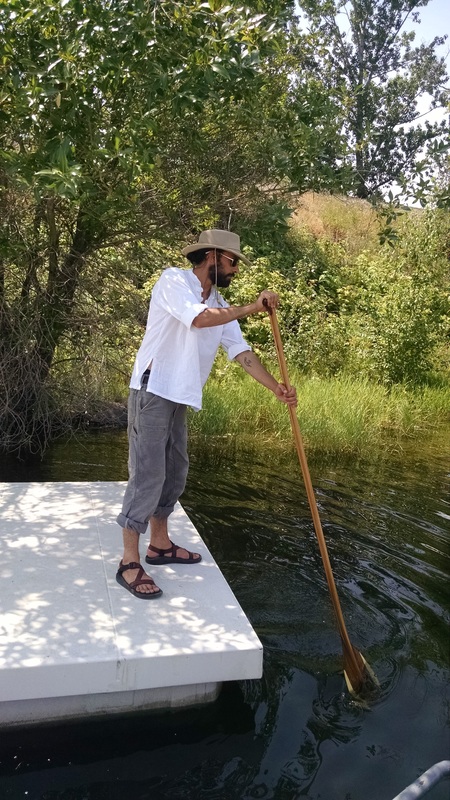
Yarn Over Idaho ©Sarah C. Swett 2016

Long Warp - Short Loom

2/16/2016

 
Or: Continuous Warping on a Tensioned Frame 
Picture
The cloth advances up the back of the loom as weaving progresses at the front.
WHY?
1. The warp circles around the loom so you can weave something up to
 1  1/2 times its height.

2. You get a good shed for the entire piece 

3. Since the warp advances, 
you can keep the fell at a comfortable positon and avoid potential back/shoulder/arm pain
Picture
Rough Copy #4; hand woven tapestry; wool warp and weft 82" x 24" ©Sarah C. Swett 2010
Picture
Green Eggs; hand woven tapestry; wool warp and weft; 52" x 4" ©Sarah C. Swett
You will need:
-Frame loom (PVC, Copper, Galvanized etc) with tension device ​
-Warp Stick:  dowel 1/2 or  3/4 inch in diameter, approximately 1" shorter than inside width of the loom 
-Straps or string for suspending warp stick
-Warp: yardage= circumference of weaving area (top to bottom plus an inch or two) x sett x warp width
-Scissors
-Tape

1. Set up loom 
a. Make sure it is square and that the tension mechanism is in a position that allows you to add (and perhaps also subtract),  tension later. 
b. Mark warp stick and top and bottom bars of loom with increments of your choice (in or cm).
 I usually do the marking on a piece of tape so I can change it later. For a sett of 8 epi, the marks can be 1/8 inch apart 
Picture
PVC pipe loom with strap tension set up to begin
 2.  Position warp stick at a comfortable height for warping (eye level is good whether you are sitting or standing) and secure with string or straps. 
-Make sure it is level (or approximately level).  Make sure your loom is level too...
 - check to make sure that the center of top bar, bottom bar and warp stick line up 
Picture
Using String to position Warp Bar. This method allows you to adjust the bar when the string is tight, but will keep it in place while you are winding the warp
Picture
Warp Stick positioned with string on PVC pipe loom (same as drawing above)
Picture
Warp Stick positioned with a motley collection of straps and string on Galvanized Pipe loom
3. Attach warp to stick with half bow
to the left of center, half the planned width of your warp
​ (i.e. for a 4" wide warp, tie two inches to the left of center).
Picture
Tying a half bow
Picture
Half Bow in real life
4. Start Winding:
Picture
 a. Beginning at  the warp stick,
bring your yarn down and under the bottom bar of  loom (front to back)
 -in the case of a PVC loom with straps see illustration above-
b. All the way up the back and over the top bar (back to front)
c.  Down and under the Warp Stick (back to front reversing direction)
d. Back up and over the top bar
e. All the way down the back and under the bottom bar (back to front)
f. Up and over the warp stick (back to front, reversing direction again)

repeat from a.
Picture
Step c: Down and under the warp stick, back to front, reversing direction
Picture
step f: Up and over the warp stick (back to front, reversing directions again)
NOTE 1: for a sett of 8 dpi, warp strands will be 1/8" apart where they go over the top and under the bottom beams.  On the Warp Stick the alternate loops will also be 1/8 inch apart
  -- try to keep warp evenly spaced (it is easier to deal with and to count this way), but exact positioning is not critical. You will have the opportunity to adjust later

NOTE 2: check periodically to make sure the winding pattern is correct and that the yarn running up the back does not cross over to the front.  If you have accidentally done this,  unwind to that point and redo it
Continue in this pattern until you have the number of warp ends you need.
one full repeat makes two warp ends

Temporarily tie or tape the end of the yarn to the warp stick before adjusting tension​.
 A double half hitch works well as you can take up the slack without untying it.
Picture
Running a hand between front and back to make sure there are no accidental cross overs.
5. Adjust tension: 
Pull on the first strand on one side above the warp stick, then on the adjacent one below the stick to take up slack. Repeat across.  Then do it again -- not to make it  more tight, but to make it more even.  Run your fingers lightly across the warp at the back; when you are done it will feel even and all the strands should stop wiggling at about the same rate.
Tie the end firmly to the warp stick. (I use a half bow again)


​6. Adjust  position of loops  on the warp stick
 The loops should be 1/8" apart (one facing up, 1/8 inch space, then one facing down). 

7. Remove string/ straps holding stick in place
and pull down on the stick, sliding it closer to the bottom of the loom (approx 4 inches above the bottom beam).  Note how the warp rotates around the loom. If you have made the warp very tight, you may have to release a little bit of tension to do this. 
When it is in position, tighten tension so it stays put.
  NOTE:  On a frame loom without an intrinsic tension device it might be possible to add tension by using shims -- sticks shoved between the warp and the top and bottom parts of the frame -- to add and release warp tension. 

8. Adjust position of warp at top and and bottom beam.

Picture
9. Make sheds:  
Slide a shed stick/dowel in above the warp stick and push it to the top of the loom.
Warp should alternate over and under the stick. 

Weave in a second stick (tongue depressor for a narrow warp) just below in the opposite shed.  (You can slide a piece of paper/ cardboard between layers of the warp so the back (stored) warp isn't too distracting while you do this.
​Push tongue depressor/second stick down until it is about 3 inches the warp stick to bring layers together


Picture
Picture
10. Twine -- Twining holds the layers together and fixes the sett
- Cut a strand of warp 2  1/2 X the width of your loom, 
-Attach it to the left side bar of the loom using a larks head knot
-Tie an overhand knot at the left side of the warp to keep it in place
Twine across:
--Slip one twining strand behind first warp and out to the front
--Bring the second twining strand over the first, behind the next warp and out to the front 
--pick up the first twining strand again, bring it over the second one and behind the next warp.
Continue across.  
Note that the two twining strands twist around each other between each warp. If you are working with a fine warp, the sett may become too close.  In this case, twist the two twining strands twice around each other between each warp to create more space.
​
Picture
Twining knot positions left side of warp
Picture
Twining across
When you get to the right side of the warp,  knot the twining strands together again to keep the warp in place.
Note: if you slip the point of a bobbin into the knot, it will help you position it exactly.

Tie the tail ends of the twining yarn to the right side bar of your loom.
Picture
Twining knot positions right side of warp
Picture
Twining in place
Picture
11. Half Hitches with craft thread
Before starting to weave, I tie double half hitches around each warp end just above the twining.
This makes extra sure that the tapestry stays in place when it is cut from the loom.  
When the tapestry is done, I repeat the double half hitches at the top before cutting off.
Picture
Picture
Now start weaving as you would on any warp.

When the fell gets uncomfortably high, advance the warp by loosening the tension on the loom and moving the warp stick until the fell is again in a comfortable position. 

The stick will soon slide under the bottom bar of the loom (this needs a VERY loose warp), and then continue up the back over time as you advance the warp.

I usually stop before the stick comes back over the top bar, but it is possible to keep going as long as you can make a shed.
Picture
As the tapestry advances, the back of the already woven cloth shows through.
Picture
I don't think physical therapists would approve of the position of this weaver's hands relative to her glasses... make sure you work at a comfortable height for your body.
Picture
Rough Copy #9; detail just before cutting it off the loom. Half Hitches across the rough top hold all the shapes in place.
Well, I think that's it!
 Hope things are clear for those who want this info.  Most of this is repeated in a slightly different form in my book Kids Weaving, so if you have the book, you're all set.
​ Happily it is due to be re-issued in the spring of 2017 so then I can just refer to it
​
Next week I plan to be back to my usual meanderings.
Nuff with the instructions, eh?

No Iron, No Internet

2/9/2016

 
Picture
Sampling (detail). Embroidery on Resist Dyed Wool Felt; wool, cotton, natural and synthetic dye.
Picture
Keeping Track (detail 1); Embroidery; wool, linen, cotton, natural and synthetic dye
Picture
Keeping Track (detail 2); Embroidery; wool, linen, cotton, natural and synthetic dye
Picture
Keeping Track (detail 3); Embroidery; wool, linen, cotton, natural and synthetic dye

Cool Tools

2/2/2016

 
Picture
The Hepty: High Whorl Spindle, cherry, 22grams. Henry C. Edwards Plying Stick: Sapele. Alexandra Iosub
and a bit of shameless promotion!
Picture
The Hepty: designed and hand made by Henry C. Edwards; Plying Stick: designed and hand made by Alexandra Iosub
Picture
Palette Box: Western Red Cedar with birch plywood interior trays designed and built by Henry C. Edwards
Picture


The Palette Box:

Its perfection
is clear
even if the photos
are not.


Picture
Removable Trays!
Picture
The lid, upside down.. See the heart?
Picture
 The Hepty

Seven Sided
high whorl spindle

1. It won't roll of the table

2.  It doesn't need a notch  (those facets do the job)
​
3. It is fast-- a quick roll up a leg and then it flies 

4. It goes and goes and goes

5. It is Balanced (straightens with a touch of the knee should it ever wobble).

6. The Shaft is buttery to the touch but with enough friction to really get going.

7. It is sturdy and short enough to spin while sitting in a chair

8. It turns the previous-pair-of-spindles-I-use into a group of three
Picture
A Wooden Boatbuilder by trade, Henry tries out a new paddle
If you are interested in the Hepty, you can contact him at [email protected]
Picture
Oak Whorl; 28 grams by Henry C. Edwards
Picture
Plying Stick --
This simple object might be as self-explanatory as a Palette box,
but I'm going to blather a bit nonetheless because mine, at first, looked more like a fragment of a Ponderosa Pine struck by lightning than an essential and life changing tool.

But first, I have to back up a few steps.
Though a spindle spinner long before I touched a wheel, 
plying was always a pain in the neck:
 two ended balls (or separate balls), endless eyelashes, 
too much to juggle and everything twirling in a different direction.
Then I met Ed Franquemont * and ever after
have followed his simple advice:

wind your singles together into a ball-- parallel but not twisted--
THEN add twist in a second step.
The reasons this works are many but I will spare you my diatribe and say only that doing this one "extra" thing has turned plying frustration and eyelash hell
into another pleasant part of the soul-satisfying process of making yarn with a spindle.

*There are endless wonderful things to say about Ed Franquemont and all he shared with the textile community.  To learn more, google him, spend time with his marvelous daughter Abby Franquemont  and read her book  Respect The Spindle


Back to the stick thing.
Winding the parallel strands of singles into a ball works pretty well for a two ply yarn, but a few years ago I wanted a spin-ply-knit-as-you-go project for some upcoming travel and decided a three strand chain ply yarn would be perfect. The stick (pictured below on the left), onto which I wound the chained (but untwisted) singles turned out to be the answer to an unasked question, and has become my go-to tool for all spindle plying no matter the number of strands.
​Both the winding and the subsequent unwinding, are easier than ever.
Picture
Plucked off the ground in a moment of winding frustration, this plying stick changed my spindle life for good.
PictureAlexandra Iosub's elegant interpretation of my rough plying stick


Picture
So that's all it is, actually
a stick for holding yarn while you ply.

Almost silly to say all this stuff about it, except I want to rave about Alexandra Iosub's version
which takes my simple chunk of unburned firewood to a whole new level of plying pleasure. Alex's sticks
-are balanced and lovely to hold while winding
-keep the strands in place 
​(no accidental sliding off one side)
-unroll in the hand with smooth and sensual pleasure as the spindle twirls toward the ground
-are available in her Etsy store!
​

A quick overview of chain plying with a spindle 
Using the singles straight off of your spindle:
1. fold the end of the singles into a loop,
2. pull another loop of singles through that loop
(length can vary -- I like to make my loops 12 - 18 inches long unless I'm adjusting for color)
3. stick a finger through the new loop and hold the 3 strands taught (two strands of loop + the singles going to the spindle) and wind onto the stick.
4. When your finger holding the loop gets close to teh stick, pull another loop through it. 
5. When your spindle is empty and your stick full, start adding twist with the spindle.
Picture
Spun on an 11 g turkish spindle, chained onto a plying stick, then twisted and sound back on the spindle
Picture
Chain plied singles provides a means to turn long stripes into short controlled bursts of color/ value
Do any of you use a plying stick?  Have you seen one? 
I think it must be what Elizabeth Zimmerman called an 'unvention.' 
Picture
Me 'n My Box ©Sarah C. Swett 2016
Oh golly, and one more thing!  The Classes are set for the Palouse Fiber Festival
Descriptions will be up soon, and Registration Opens 1 March.

See you next week!
    Picture

    ​Sarah C Swett 
    tells stories
    with
    ​ and about

     hand spun yarn. 


    Picture
    Click for info on
    my four selvedge
    warping class
    with
    ​ Rebecca Mezoff  
    fringeless


    Categories

    All
    Backstrap
    Books
    Cellulosic Experiments
    Clothes
    Coffee Filter Yarn
    Comics
    Distractions
    Dyeing
    Embroidery
    Hand Spinning
    Knitting
    Linsey Woolsey
    Looping
    Mending
    Milkweed
    Out In The World
    Plain Weave
    PVC Pipe Loom
    Shoes
    Sketchbook
    Slow Literature
    Tapestry
    Textile Tools
    Things To Wear
    Vague Instructions
    Willow

    Archives

    September 2021
    June 2021
    April 2021
    March 2021
    November 2020
    October 2020
    September 2020
    August 2020
    July 2020
    May 2020
    April 2020
    March 2020
    February 2020
    January 2020
    December 2019
    November 2019
    October 2019
    September 2019
    July 2019
    June 2019
    May 2019
    April 2019
    March 2019
    February 2019
    January 2019
    December 2018
    November 2018
    October 2018
    September 2018
    July 2018
    June 2018
    May 2018
    April 2018
    March 2018
    February 2018
    January 2018
    December 2017
    November 2017
    October 2017
    September 2017
    August 2017
    July 2017
    June 2017
    May 2017
    April 2017
    March 2017
    February 2017
    January 2017
    December 2016
    November 2016
    October 2016
    September 2016
    August 2016
    July 2016
    June 2016
    May 2016
    April 2016
    March 2016
    February 2016
    January 2016
    December 2015
    November 2015
    October 2015
    September 2015
    August 2015
    July 2015
    June 2015
    May 2015
    April 2015
    March 2015
    February 2015
    January 2015
    December 2014
    November 2014
    October 2014
    September 2014
    August 2014
    July 2014
    June 2014
    May 2014
    April 2014

things to make:
yarn . music . friends
whatever it is you cannot 

not
begin
Proudly powered by Weebly